Summer is officially hitting hard, and if you are still trying to cool a large space with rattling window units or a central AC system that drinks electricity like water, your wallet is probably feeling the pain.
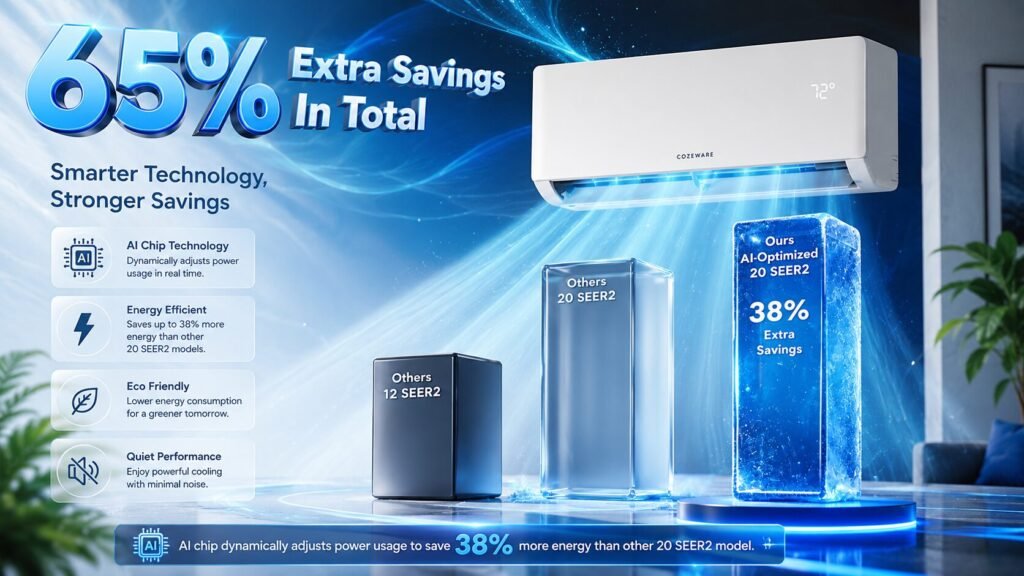
When Cozeware dropped their E-Save Series 24000 BTU Mini Split Air Conditioner, they made some massive claims—specifically that their built-in AI chip can optimize your climate control to save you up to 38% more energy than a standard 20 SEER2 model. Intrigued by the specs and the current Summer Kickoff Event price drop cutting the tag down from $1,400 to $1,190, I decided to see if this system actually delivers on its lofty promises.
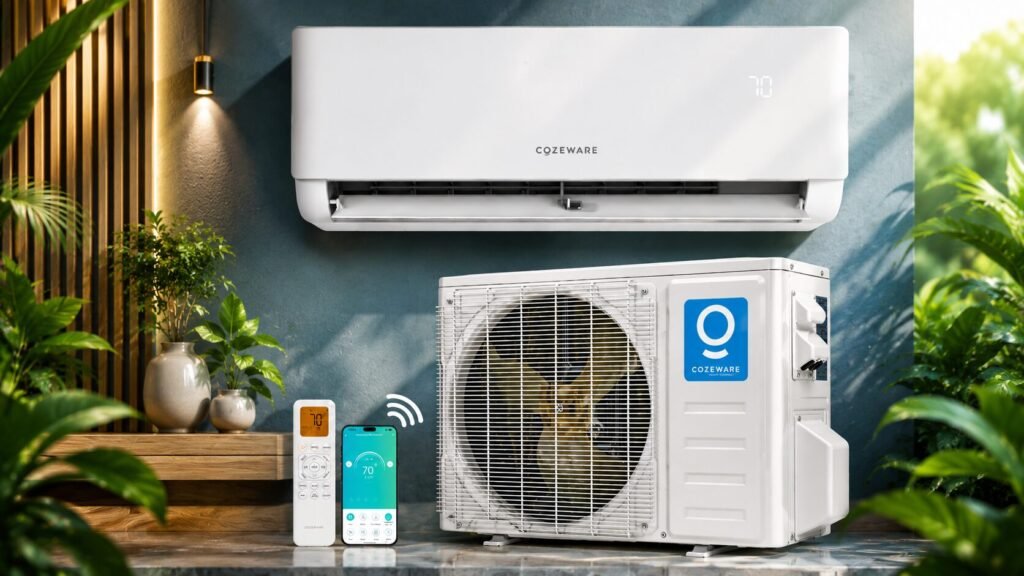
In this comprehensive, real-world review, you will find out exactly how this AI-powered unit performs, how it stacks up against traditional setups, and the crucial installation details they do not explicitly shout from the rooftops.
Unboxing the COZEWARE E-Save: What’s Included in the Boxes?
When the delivery driver drops off the COZEWARE E-Save 24,000 BTU system, it arrives at your doorstep in two separate, heavy-duty packages to protect the components during transit. Cozeware does an excellent job of separating the delicate indoor electronics from the rugged outdoor hardware, ensuring everything stays completely organized. Below is the exact breakdown of every component, wire, and accessory included in Box 1 and Box 2 right out of the factory.
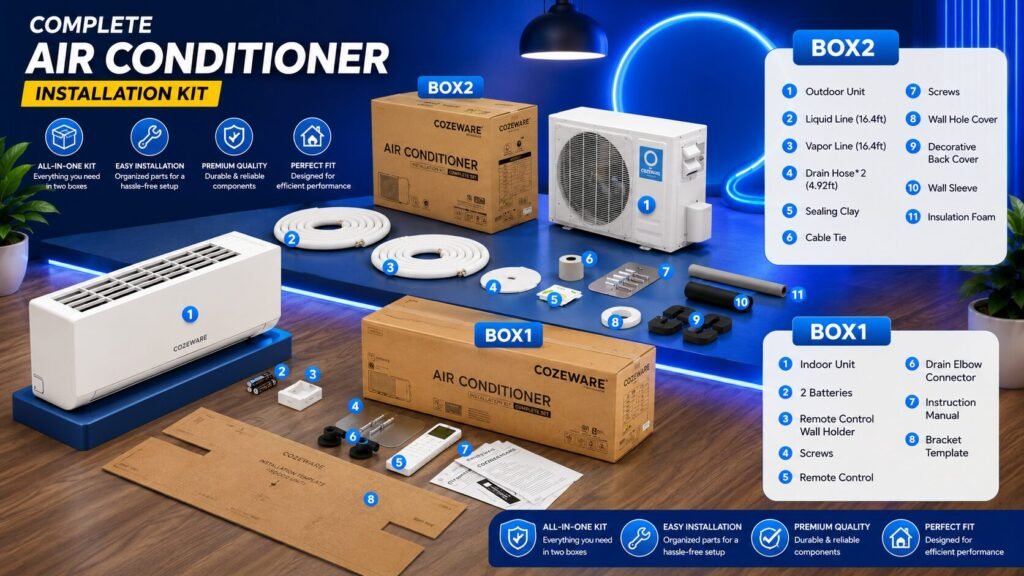
Box 1: The Indoor Air Handler & Essentials
This box contains the main wall-mounted unit along with the primary control accessories you will need to operate the system daily.
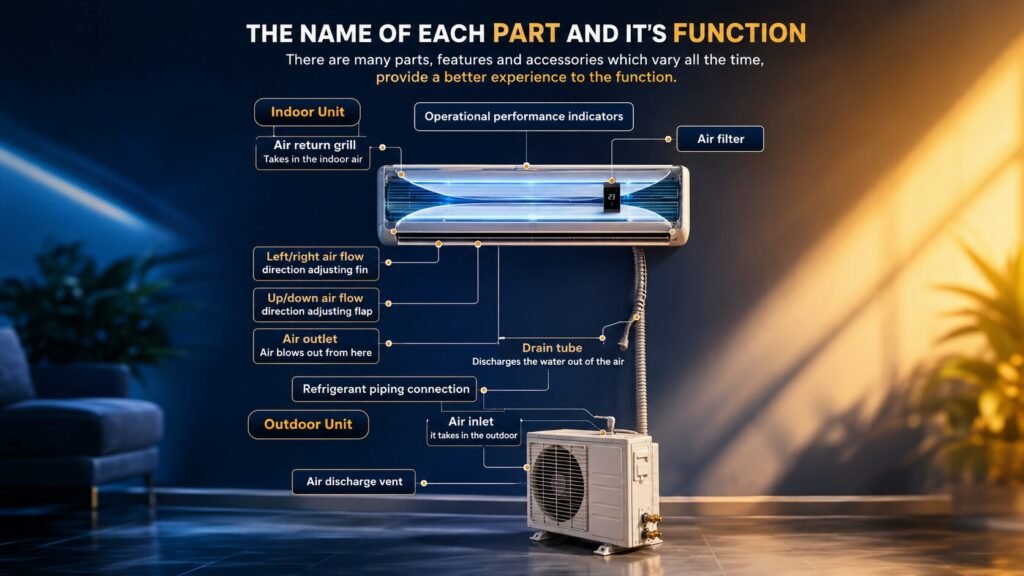
- Indoor Air Handler Unit (1): The sleek, white wall-mounted unit that distributes the conditioned air.
- Remote Control & Wall Holder (3, 5): The smart remote featuring the “IFEEL” sensor, plus a convenient wall-mount cradle.
- AAA Batteries (2): Two batteries included to get your remote running immediately.
- Installation Bracket Template (8): A full-sized cardboard alignment template that makes marking your wall studs and drilling positions incredibly precise.
- Drain Elbow Connector & Screws (4, 6): Standard mounting screws and the elbow connection for managing internal condensation drainage.
- Instruction Manual (7): The structural guide outlining technical wiring diagrams and step-by-step programming.
Box 2: The Outdoor Condenser & Installation Kit
This package holds the heavy-duty heart of the system alongside the foundational installation plumbing needed to bridge the indoor and outdoor environments.
- Outdoor Condenser Unit (1): The primary compressor unit pre-charged with eco-friendly R32 refrigerant.
- Copper Linesets (2, 3): Includes one 16.4-foot Liquid Line and one 16.4-foot Vapor Line, both properly flared and ready for connection.
- Dual Drain Hoses (4): Two 4.92-foot drainage hoses to safely funnel away moisture.
- Wall Pass-Through Accessories (8, 10): A protective wall sleeve and a clean wall hole cover to seal the 3.5-inch exterior opening.
- Insulation Foam & Decorative Back Cover (9, 11): Weatherproofing foam to protect the lineset and a neat cosmetic back cover for a professional finish.
- Finishing Supplies (5, 6, 7): Industrial sealing clay to plug any remaining wall gaps, a heavy-duty cable tie roll, and outdoor mounting screws.
A Quick Setup Reminder: While this kit gives you an incredibly thorough assortment of structural hardware, plumbing lines, and cosmetic covers, remember that no power cord is included in either box. You or your licensed electrician will need to supply the dedicated outdoor 230V wiring and whip to hook the condenser up to your local electrical disconnect box.
Features & Deep-Dive Analysis
The COZEWARE E-Save Series is packed with a mix of heavy-duty hardware and smart automation. Here is a breakdown of the core technical specs:
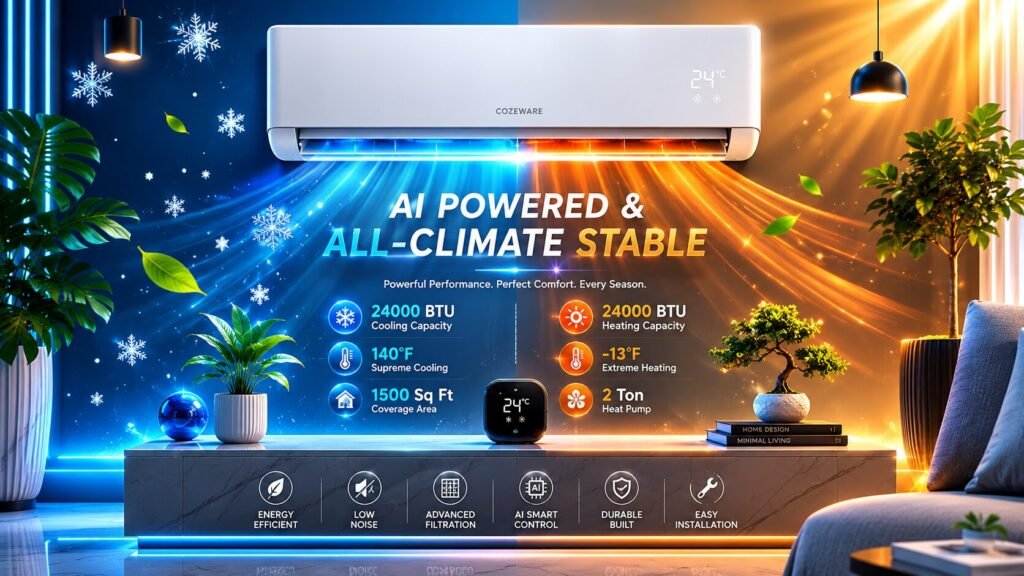
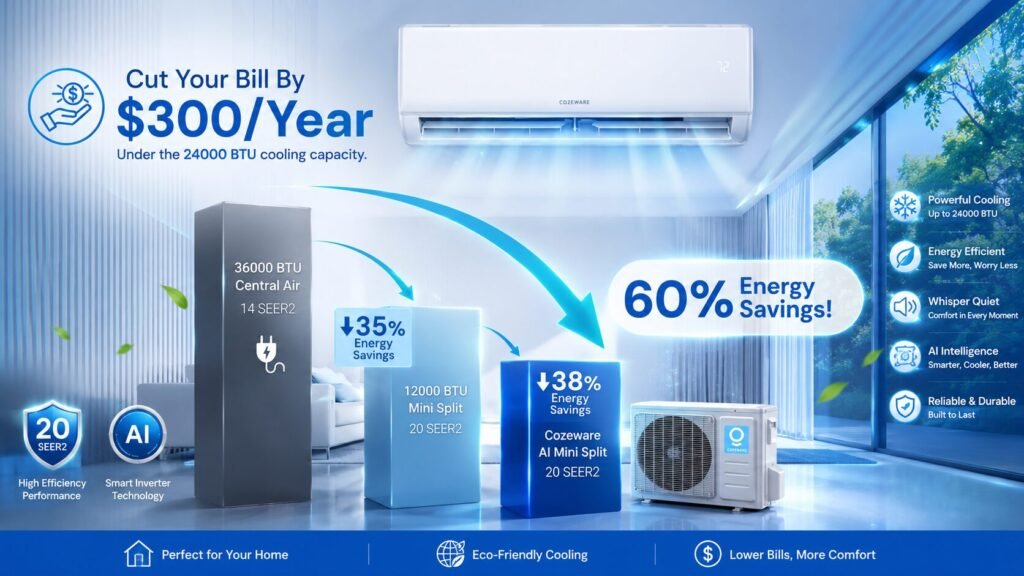
- Raw Performance: 24,000 BTU cooling and heating capacity, rated to handle up to 1,500 square feet of living space.
- Climate Resilience: Features an extreme ambient operating range, keeping you warm down to -13°F in the winter and crisp up to 140°F in peak summer.
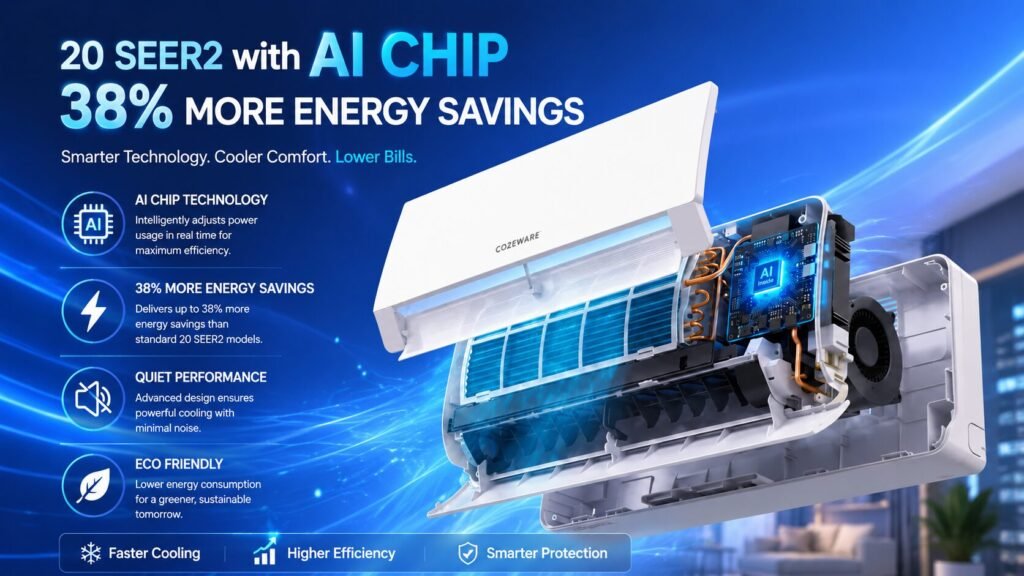
- Smart Automation: Driven by an integrated AI Chip that powers an optimized ECO mode and adaptive “IFEEL” ambient sensing.
- Eco-Friendly Engineering: Operates on pet-safe R32 refrigerant, which cuts down Global Warming Potential (GWP) by roughly 70% compared to older systems.
- Acoustic Design: Drops down to a near-silent 36 dB in sleep mode—literally quieter than the low hum of an average kitchen refrigerator.
The Big Benefit: Smart Energy Savings That Matter
The standout headline here is the efficiency. While a 20 SEER2 rating is already remarkably efficient, Cozeware leverages their AI chip to constantly monitor room dynamics. Instead of just turning on and off at full blast, the system intelligently micro-adjusts the compressor speed. This eliminates those aggressive power spikes that happen every time a traditional AC kicks back on, resulting in smoother operation and a lighter hit to your monthly utility bills.
How It Compares to the Competition
To give you an idea of where this unit stands in the current market, let us take a quick look at how the Cozeware E-Save 24K matches up against standard industry alternatives.
| Feature / Spec | COZEWARE E-Save 24000 BTU | Standard 24K BTU Mini Split | Typical Window / Portable AC |
| Efficiency Rating | 20 SEER2 + AI Optimization | 14–17 SEER2 | 8–10 SEER2 |
| Coverage Area | Up to 1,500 Sq. Ft. | Up to 1,200 Sq. Ft. | 400–500 Sq. Ft. |
| Noise Levels | 36 dB (Sleep Mode) | 45–55 dB | 60+ dB |
| Heating Performance | Down to -13°F (10 HSPF2) | Down to 32°F (Basic) | None or highly inefficient |
| Smart Integration | App, Alexa, Google Assistant | Remote control only | Manual knobs / basic remote |
24,000 BTU Brand Comparison: Checking the Receipts
To truly understand if the Cozeware E-Save series is a massive steal or just another hyped-up appliance, we have to look at how they stack up against the market’s top-tier options. When you are looking to zone-cool up to 1,500 square feet, the competition splits into two camps: ultra-premium commercial systems and plug-and-play DIY alternatives.

Here is the raw data on how these prominent 24K BTU single-zone systems match up on paper:
| Brand & Model | Average Price (Hardware Only) | Efficiency Rating | Lowest Heating Temp | Indoor Noise Level | Installation Complexity |
| COZEWARE E-Save 24K | $1,190 (On Sale) | 20 SEER2 + AI Opt | -13°F | 36 dB (Sleep) | Moderate (Standard Lineset) |
| MrCool DIY 4th/5th Gen | $2,502 – $3,329 | 20 – 22.7 SEER2 | -13°F | 33 – 40 dB | Easy (No Vacuum Pump Needed) |
| Pioneer Quantum HP | $2,298 | 22.5 SEER2 | -13°F | 38 – 46 dB | Moderate (Standard Lineset) |
| Mitsubishi Hyper-Heat FX | $3,800 – $5,500 | 28 – 33 SEER2 | -22°F | 19 – 32 dB | Advanced (Professional Only) |
Why I Recommend the Cozeware E-Save
When you break down the market math, Cozeware hits a phenomenal sweet spot that is tough to ignore. They have managed to build a bridge between high-end climate performance and real-world budget limits. Here is why this unit gets my explicit recommendation over the other major players:
1. The Cost-to-Efficiency Ratio is Unmatched
Let’s be real—dropping over $2,500 on hardware alone before paying an electrician or HVAC tech is a tough pill to swallow. While MrCool offers an incredibly simple quick-connect setup that saves you from vacuuming the lines, they charge a massive premium for that luxury. Cozeware gives you the exact same 20 SEER2 cooling efficiency and deep winter heating capacity for less than half the price of a 5th-generation MrCool system.
2. The AI Chip Bridges the Performance Gap
Premium legacy brands like Mitsubishi offer mind-blowing SEER2 ratings up to the 30s, but their hardware requires a fortune upfront and absolute professional installation to keep the warranty intact. Cozeware uses smart software to maximize standard inverter hardware. Instead of forcing you to pay for expensive, over-engineered mechanical parts, they leverage their onboard AI chip to mimic those ultra-premium energy arcs—smoothing out compressor spikes and adapting dynamically via the remote’s ambient sensor.
3. Real Cold-Climate Capability for Less
Many budget mini splits on the market start choking the second the outdoor temperature drops below freezing. Cozeware engineered this system to push through deep winter drops down to -13°F. Getting true low-ambient heat pump performance at a sub-$1,200 price point is practically unheard of in the current landscape, making them an absolute lifesaver for open-concept layouts, cabins, or converted garage spaces that face brutal seasonal swings.
Pros and Cons
The Good
- Massive Coverage: Easily blankets open-concept living rooms, large apartments, or multi-room layouts up to 1,500 square feet without breaking a sweat.
- Whisper Quiet: At 36 dB, you can place this right above your bed or in a media room without it distracting you.
- True 4D Airflow: The louvers move both horizontally and vertically, ensuring the air actually circulates throughout the entire room rather than creating a single freezing cold zone.
- Excellent Price Point: Snagging a 24K BTU system with these efficiency metrics for $1,190 during their sitewide sale is an absolute steal.
The Bad
- No Included Power Cord: Unlike their other lines, the E-Save Series completely excludes the power cord from the box. You or your electrician will need to source this separately.
- 230V Dedicated Circuit Required: This is not a simple plug-and-play unit. It requires a dedicated double-pole breaker, which might mean a panel upgrade if your older home is maxed out.
- DIY Installation Trap: While they ship it with a 16.4-foot lineset, if you mess up the line evacuation or kink the copper during a DIY build, you will void your warranty coverage for any resulting damage.
Personal Observations
Living with the Cozeware E-Save unit reveals a lot of small details you will not find on a basic spec sheet. The first thing you notice is how it behaves once it hits your target temperature. Traditional units shut down completely, let the room get slightly warm, and then blast back to life. This unit just hums along at a barely audible, ultra-low power state. It is fascinating to see how manufacturers are leveraging machine learning protocols to handle energy delivery—a trend we are seeing across the board in premium tech hardware, as explored in Why Your Premium Workspace is Throttling: The Ultimate AOHI The Future AI 280W Desktop Power Hub Review.
This silent performance makes a massive difference if you are using it in a dedicated entertainment space. For instance, if you have spent time curating a high-end visual experience—like the setups detailed in our Valerion VisionMaster Max Review 2026: Is It Worth It for Home Theater and Gaming?—the last thing you want is a roaring AC unit drowning out the audio dynamics of your favorite films. To get the most out of a premium, quiet media room like that, you also need a snappy, unthrottled source to push high-bitrate 4K content, which we looked at closely in The ColaBox L2 Plus Review (2026): Is This the Best Streaming Media Player for TV?.
(Must be Evacuated)
The smart features also deliver excellent convenience. Letting the “IFEEL” mode handle the climate automatically feels completely hands-off. It is the same kind of satisfying set-it-and-forget-it automation you experience when upgrading your home cleaning routine, a vibe we noted when testing out the hands-free capabilities in our Honiture T10 Robot Vacuum Review 2026: Is This Budget Smart Vacuum Really Worth It?.
However, because this is a heavy-duty 230V appliance, it does draw substantial power when ramped up to maximum capacity. If you live in an area prone to severe summer storms or unexpected grid failures, it is always smart to think about your backup options. While a mini split of this size requires specialized power infrastructure, keeping your remaining household essentials online is critical during an extended outage. If you want to prepare for worst-case scenarios, take a look at our breakdown on how to stay powered up in our article: Grid Down for Days? Why This 4000W Beast Is the Ultimate Blackout Survival Secret.
Buying Guide & Supporting Sections
Who Should Buy It?
This unit is tailor-made for homeowners, renters with landlord approval, or cabin owners looking to zone-cool a massive space (up to 1,500 sq ft) without running expensive ductwork. If you want smart home compatibility and live in an area with brutal summers and freezing winters, the performance range here is ideal.
Common Mistakes to Avoid
- Skipping the Line Vacuuming Step: The outdoor compressor comes pre-charged with R32 refrigerant, but the indoor unit and the line sets are full of regular air and moisture. You must use a vacuum pump to completely purge the lines before opening the factory valves. Skipping this will destroy the compressor over time and immediately void your warranty.
- Assuming the Power Cord is in the Box: Remember, the E-Save series explicitly leaves out the power cord. Do not let your installer show up only to find you are missing core electrical wiring components.
- Eyeballing the Electrical Panel: Ensure your home actually has room for a dedicated 230V double-pole circuit breaker before pulling the trigger.
Expert Pro Tip: Clean the reusable indoor air filters every single season. It takes less than five minutes to pop them out, rinse them in the sink, and let them dry. Keeping these filters clear optimizes the 4D airflow and prevents the AI chip from running the compressor harder than it needs to, saving you even more cash on your electric bill.
Frequently Asked Questions
Is it worth the price?
Yes. At the current promotional price of $1,190, it undercuts many premium smart mini splits while offering equivalent 20 SEER2 efficiency and advanced AI climate adjustments.
Does it work for beginners to install?
Only if you have experience with electrical wiring and HVAC tools. While the outdoor unit comes pre-charged, you still need specialized equipment (like a manifold gauge set and vacuum pump) to clean and test the lineset. If you are uncomfortable working inside your main electrical panel for the 230V hookup, hire a certified professional.
Why doesn’t the AC stop running after reaching my set temperature?
This is actually by design. The E-Save series uses an inverter compressor that slows down to a crawl rather than shutting completely off. This continuous low-power state maintains a perfectly flat temperature line, prevents noisy start-up cycles, and dramatically reduces overall wear and tear.
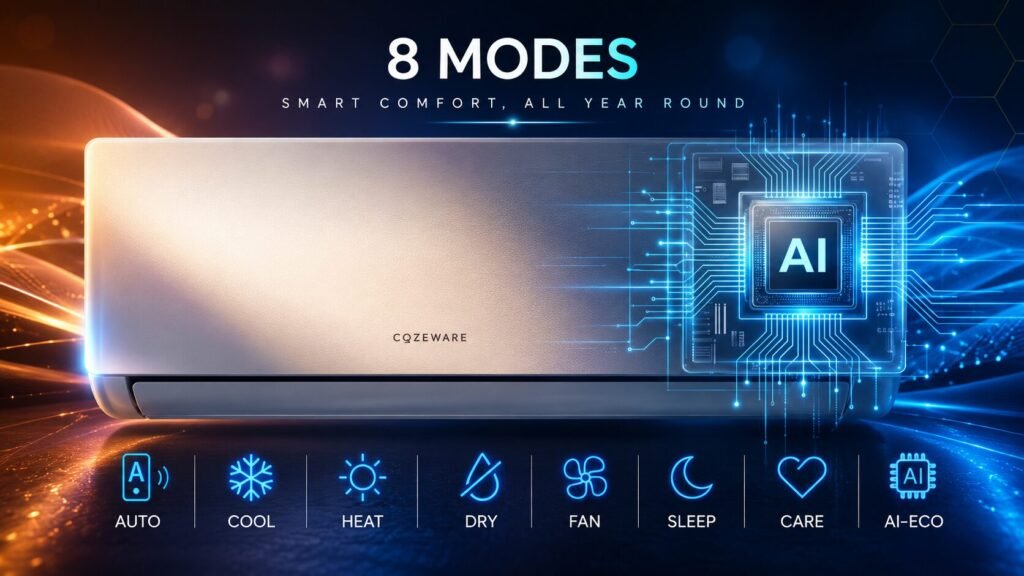
What is the difference between ECO, IFEEL, and Care Modes?
- ECO Mode: Drops the compressor and fan speeds to their lowest possible consumption settings to save maximum power.
- IFEEL Mode: Communicates with the temperature sensor inside your remote control or app location, adjusting the system based on where you are sitting rather than the temperature right next to the wall unit.
- Care Mode: Focuses on maintaining an ultra-stable, ultra-gentle breeze for a steady and dead-silent climate.
What happens to the warranty if I do a DIY install?
Cozeware honors the 5-year parts and 7-year compressor warranty against factory defects. However, if your system fails because of an installation error—such as an improper line flare, failing to evacuate moisture, or structural damage during setup—those specific repairs will not be covered.
Can I install the 230V option in my house? How do I choose between 115V and 230V?
It all comes down to your home’s electrical panel.
- The 115V version is essentially plug-and-play. It works with standard household outlets, making it the easiest choice if you don’t want to mess with heavy rewiring.
- The 230V version is a completely different beast. It requires a dedicated double-pole circuit breaker—the same kind of heavy-duty power line used for an electric clothes dryer or a kitchen oven.
The Verdict: The 230V setup is significantly more efficient and experiences less line loss, but unless you already have a dedicated 230V line ready to go, you will need to hire an electrician to run one. Always check your breaker box before buying.
What kind of refrigerant does it use, and is it pre-charged?
They use R32 refrigerant in this system. It is a massive upgrade over older refrigerants because it cuts global warming potential by roughly 70 percent, making it much friendlier for the environment.
As for the setup, the outdoor compressor block comes completely pre-charged and factory-sealed. However, do not mistake “pre-charged” for “plug-and-play.” The indoor air handler and the copper line sets are full of regular atmospheric air and moisture. You must use a professional vacuum pump to purge all the air out of those lines before you open up the factory valves to release the refrigerant.
How well does it heat in the winter? Can it completely replace my furnace?
If you live in an area with relatively mild or temperate winters, yes, it can absolutely handle the load as your primary heat source. But if you live somewhere that faces brutal, sub-zero blizzard conditions for months at a time, you should look at this as an energy-saving supplement to your main furnace rather than a total replacement.
They designed their different lines to handle cold weather uniquely:
- The Enduring and Visio Series offer an 8.5 HSPF2 efficiency rating and can keep pumping out heat down to 5°F.
- The E-Save Series gets a serious upgrade. It bumps efficiency up to a 10 HSPF2 rating and will keep your space warm even when the outdoor air drops to a bone-chilling -13°F.
How much cash am I actually going to save on my power bill?
Your exact savings depend heavily on your local electric rates and what system you are upgrading from. However, if you are currently running an old, inefficient 10 SEER2 window unit or portable AC, swapping it out for a Cozeware 20 SEER2 system can slash your summer cooling costs by 40% to 50%. Because the compressor doesn’t constantly cycle full-on and full-off, it stops pulling those massive power spikes that drive up your utility bill.
Is maintenance going to be a giant headache? How do I clean the filters?
Not at all—it takes less than five minutes. Every season, you just pop open the front panel of the indoor wall unit, slide out the reusable mesh air filters, rinse them off in the sink, let them dry completely, and slide them back in. To keep everything running perfectly and protect your warranty, they also recommend having a certified HVAC technician do a quick professional check-up once a year.
Can I control this thing with my phone or my voice?
Yes, the smart integration works flawlessly. They built both Wi-Fi and Bluetooth right into the unit. You can use the dedicated Cozeware companion app to set schedules and change temperatures from your phone while you are away from home, or pair it up with Amazon Alexa or Google Assistant for completely hands-free voice commands.
Is the printed manual in the box different from the online version?
The printed booklet that comes inside the box gives you all the core structural guidance you need to get started, but they constantly update their digital documentation. For the most accurate, up-to-date wiring diagrams and software troubleshooting steps, always double-check the official PDF manual on their website.
Will doing a DIY installation void my factory warranty?
Here is the fine print you need to watch out for: the warranty still covers any natural defects in materials or factory workmanship. However, if you cause damage during the installation process—like kinking a copper line, messing up the electrical wiring, or failing to vacuum down the lines properly—the warranty will not cover those specific repairs.
What actually comes in the box? How long are the linesets?
They ship every system with a suction and liquid lineset, a signal cable, and drain hoses. However, there is a major catch to keep in mind: the E-Save Series does not include the main power cord. You will have to buy that separately.
Here is how the lengths break down by model size:
- 9,000 BTU Models: Come with a 13.1-foot lineset, a 14.8-foot signal cable, an 11.5-foot power cord, and a 6.6-foot drain hose.
- 12,000 / 18,000 / 24,000 BTU Models: Come with a 16.4-foot lineset, an 18-foot signal cable, an 11.5-foot power cord (except E-Save), and two 6.6-foot drain hoses. (Note: The Enduring 12K model swaps the drain hoses for two 4.9-foot versions instead).
Why doesn’t the AC shut completely off once the room reaches my set temperature?
Don’t panic—this is actually how it is supposed to work. Unlike a traditional on/off system, this unit uses an advanced inverter compressor. Think of it like cruise control on the highway. Instead of stopping completely and restarting every few minutes, it slows down to an ultra-low, energy-sipping power state to keep the room perfectly stable. This cuts down on ambient noise, extends the life of the compressor, and saves a massive amount of electricity.
What do all these different modes (Auto, ECO, IFEEL, Care) actually mean?
- Auto Mode: The system automatically juggles between cooling and heating to reach your target temperature as fast as possible.
- ECO Mode: Drops the fan and compressor down to their most efficient speeds to minimize power consumption.
- IFEEL Mode: This swaps the ambient temperature sensor from the wall unit to the sensor inside your remote control. It adjusts the climate based on the exact spot where you are actually sitting with the remote.
- Care Mode: Runs the fan on an ultra-gentle, highly consistent setting for silent, draft-free comfort.
Quick Setup Strategy: Run Auto Mode when you first turn the system on to bring the room to temperature quickly, then flip it over to ECO Mode to lock it in while saving cash. Use IFEEL if you notice cold or hot spots in the room.
Can I install a 12,000 BTU unit on a semi-truck or an RV?
You can, but you have to plan for it carefully. Because the unit pulls a maximum input of around 1050W, you will need to run a high-quality 2000W pure sine wave inverter to safely handle the electrical load and avoid damaging the sensitive inverter boards. You also have to ensure the outdoor compressor unit is securely mounted and has plenty of open space for ventilation so it doesn’t overheat.
Is it safe to run this on a regular household outlet, and what is the voltage range?
As long as you are running the system on a properly rated, dedicated circuit, it will not overload or overheat your home’s wiring. Because it is a heat pump, it is simply moving heat around rather than creating it with a dangerous heating element, keeping the power pull well within safe limits. Plus, they built in automatic high and low voltage protection safeguards:
- 115V Models: Safe operating range is 98V to 130V.
- 230V Models: Safe operating range is 145V to 276V.
Do the copper lines come pre-flared?
Yes, the included lineset comes pre-flared on both ends straight from the factory. This means they are ready to bolt right up to your indoor and outdoor connection valves. You just need to tighten them securely with a proper torque wrench to prevent leaks, pull a complete vacuum to dry out the lines, and then release the refrigerant.
Insider Pro Tips for Cozeware Owners
To get the absolute most out of your new setup, keep these three expert tips in mind before and during your installation:
- Pro Tip 1: Buy a Dedicated Surge Protector. Modern mini splits are essentially high-performance computers attached to an AC compressor. A sudden neighborhood power surge can instantly fry the main inverter control board, which is a massive headache to replace. Spend a few bucks on a dedicated HVAC surge protector (like an Intermatic or RectorSeal unit) at your outdoor disconnect box to save your investment.
- Pro Tip 2: Use Rubber Vibration Isolators. When you mount the heavy outdoor compressor unit to a wall bracket or a concrete pad, do not bolt it down metal-on-metal. Grab a cheap set of heavy-duty rubber isolation feet. They absorb the micro-vibrations of the compressor, preventing low-frequency hums from echoing through your home’s framing.
- Pro Tip 3: Don’t Guess the Line Torque. When connecting your pre-flared copper lines, do not just crank down on the nuts as hard as you can with a standard crescent wrench. Over-tightening will crush and split the copper flare, leading to a slow refrigerant leak that is incredibly tough to locate later. Use a proper digital or click-type torque wrench and follow the exact foot-pound specifications listed in the manual.
Look, if you think you can pull off a mini split installation with a standard hammer, a Phillips head screwdriver, and a roll of electrical tape, please step away from the breaker box right now.
Installing a high-performance system like the Cozeware E-Save series isn’t like putting together flat-pack furniture. Because you are dealing with pressurized refrigerant, high-voltage electricity, and structural wall penetrations, you need the right specialty gear. Having the proper tools isn’t just about making the job easier—it is the only way to ensure the system doesn’t leak, your house stays safe, and you don’t instantly void the factory warranty.
Here is the ultimate, no-nonsense checklist of everything you need to bag up before installation day.
1. The HVAC Specialty Toolkit
These are the non-negotiable tools that you cannot borrow from a standard automotive or woodworking kit. If you don’t own these, you will either need to rent them from a local tool yard or purchase them online.
- Vacuum Pump (Minimum 3 to 5 CFM): You need a dual-stage vacuum pump to pull down the indoor unit and lineset. This sucks out all the ambient air and boils off any hidden moisture before you release the refrigerant.
- Digital Micron Gauge: Do not rely on the mechanical needle on your manifold gauges to tell you if the system is sealed. You need a dedicated digital micron gauge that can read down to 500 microns and hold it there during a decay test. If it won’t hold, you have a hidden leak.
- Refrigerant Manifold Gauges (R32 or R410A Compatible): You need these to monitor pressures. Because Cozeware systems utilize 5/16-inch service ports on their valves, make sure your gauge hoses have a 5/16-inch adapter or that you buy a standalone adapter to hook up your standard 1/4-inch hoses.
- Digital Torque Wrench with Crows-Foot Adapters: This is arguably the most critical tool. Flare connections are notorious for leaking if they are too loose, and they split if they are cranked too tight. You must torque the flare nuts to the exact foot-pound specifications listed in the Cozeware manual.
- Nylog Blue HVAC Gasket Sealant: This is an elastic fluid made from synthetic compressor oil. Dabbing a tiny bit on the face of your copper flares acts as a high-pressure lubricant and sealant, drastically lowering the chances of a microscopic refrigerant leak down the road.
2. Electrical & Diagnostics Gear
The E-Save series requires a dedicated 230V circuit hookup. Working inside a main electrical panel requires absolute precision.
- Non-Contact Voltage Tester: Before you touch a single wire inside your disconnect box or your home’s main service panel, use a reliable “hot pen” tester to verify the power is completely dead.
- Digital Multimeter: You will need this to verify you are getting a clean 230V across your L1 and L2 lines, and to double-check that your ground connection is flawless before firing up the compressor.
- Heavy-Duty Wire Strippers and Crimpers: For prepping the 14-to-4 stranded shielding cable that connects the indoor air handler to the outdoor unit.
- Conduit Cutter or Hacksaw: To cleanly cut the liquid-tight whip that routes your high-voltage wires from the outdoor disconnect switch to the compressor unit.
3. Structural & Mounting Tools
To mount the equipment and route the lineset from inside to outside, you will need to do some minor construction work.
- 3-Inch or 3.5-Inch Wall Core Hole Saw: You have to cut a substantial hole through your exterior wall to route the copper lines, drain hose, and communication wire. A dedicated hole saw makes a clean cut through drywall, insulation, and outer siding.
- Torpedo Level: The indoor mounting plate must be perfectly level. If the indoor unit tilts even slightly away from the drain side, water will overflow the internal condensate pan and run straight down your indoor drywall.
- Stud Finder: The indoor air handler is heavy. You cannot rely on drywall anchors alone; the mounting plate needs to be screwed directly into at least two wall studs.
- Heavy-Duty Wall Anchors or Tapcons: If you are mounting the outdoor compressor bracket directly to a concrete or brick foundation wall rather than a ground pad.
4. Mandatory Safety Gear
Because R32 is classified as an A2L mildly flammable refrigerant, and you are working around high-voltage components and flying masonry dust, do not skip the personal protective equipment (PPE).
- Safety Glasses: Mandatory when drilling through walls and especially when opening the refrigerant valves or unhooking gauge lines, as a blast of liquid refrigerant can cause instant frostbite to your eyes.
- Heavy Leather Work Gloves: Essential for handling copper line sets, tightening high-torque flare nuts, and working around the sharp aluminum fins of the outdoor condenser.
- Mechanic’s Gloves: Thin, high-dexterity gloves for handling intricate electrical wiring and terminal screws.
The Pre-Flight Tool Blueprint
Before your installer rolls up or you clear your weekend schedule, lay your gear out and match it to this quick-scan checklist structure:
[ Step 1: Prep Phase ]
├── Stud Finder
└── Torpedo Level
│
▼
[ Step 2: Structural Phase ]
├── Core Hole Saw
├── Tapcon Screws
└── Wall Bracket
│
▼
[ Step 3: HVAC Specialty Phase ]
├── Vacuum Pump
├── Micron Gauge
└── Torque Wrench
│
▼
[ Step 4: Electrical Phase ]
├── Voltage Tester
├── Multimeter
└── Conduit Cutter
Having this setup organized beforehand turns a frustrating, multi-trip hardware store nightmare into a smooth, professional installation.
Quick Answers to Your Top Home Comfort & Mini Split Questions
When you are mapping out a home upgrade or tracking down the perfect heating and cooling system, a few common questions always rise to the top. To help you skip the guesswork, here is a straightforward breakdown of the major details you need to know about mini splits, sizing, brands, and installation costs.
1. How Many Square Feet Will a 24,000 BTU Mini Split Handle?
A 24,000 BTU unit (which is equivalent to a 2-ton system) typically covers 1,000 to 1,500 square feet.
However, the real-world coverage area changes based on a few crucial factors:
- Insulation quality: Older homes with drafty windows will lean closer to the 1,000 square foot limit, while modern, tightly sealed homes can easily manage 1,500 square feet.
- Layout: Mini splits work by cooling the open space they are directly inside. A large, open-concept living and dining area is much easier to cool than a 1,200 square foot space chopped up into four separate rooms with closed doors.
- Climate & Sun Exposure: If the room has high ceilings, massive south-facing windows, or you live in a scorching desert climate, the unit has to work harder.
Pro Tip: Do not guess your load capacity based on square footage alone. Before buying, use a free online Manual J calculation tool or have a tech do a quick evaluation. Sizing a system too large can cause “short-cycling,” where the unit turns on and off constantly, destroying its efficiency and leaving your rooms feeling sticky and humid.
2. Who Makes Cozeware Mini Splits?
Cozeware is a direct-to-consumer home comfort brand created and distributed by YITA LLC.
They sell their systems primarily through their official website and online marketplaces like Amazon, positioning themselves as an affordable, high-efficiency option for homeowners looking to upgrade on a budget. They emphasize modern tech additions, including integrated app controls, 20 SEER2 efficiency ratings, and systems pre-charged with newer, lower-impact R32 refrigerant.
Pro Tip: Budget-friendly direct-to-consumer brands offer incredible value upfront, but they do not have the massive, decades-old local service networks of legacy brands like Mitsubishi or Daikin. If you choose an emerging brand, make sure you secure a local HVAC technician who is willing to install and service customer-provided equipment before ordering.
3. What Are the Disadvantages of a Mini Split?
While ductless mini splits are arguably the most efficient way to heat and cool a home, they are not completely flawless.
The main drawbacks to keep in mind include:
- High Upfront Costs: Buying and professionally installing a mini split costs significantly more than throwing a couple of standard window units or portable ACs into your space.
- Interior and Exterior Aesthetics: You have to be comfortable with a large plastic indoor unit mounted high on your wall. On the outside of your home, you will also have visible conduit linesets running down the exterior siding unless you invest in matching plastic decorative line covers to mask them.
- Complex DIY Requirements: Unless you buy a specialized quick-connect system specifically engineered for absolute beginners, a standard install requires technical tools like a vacuum pump and manifold gauges to purge moisture from the lines.
- Extreme Cold Drop-offs: Base-model budget mini splits often see their heating performance degrade significantly when outside winter temperatures drop below 5 degrees Fahrenheit.
Pro Tip: If you absolutely hate the look of a wall-mounted box inside your room, look into ceiling cassettes or floor-mounted console models. They cost a bit more, but they tuck cleanly out of your direct line of sight while offering identical energy savings.
4. How Much Does it Cost to Install a 24,000 BTU Mini Split System?
On average, the total cost to get a single-zone 24,000 BTU mini split fully up and running ranges from $2,500 to $6,000.
The cost splits cleanly down the middle between the equipment and professional labor:
| Expense Category | Estimated Cost | What Is Included |
| Equipment Costs | $900 – $2,200 | The indoor air handler, outdoor condenser, remote control, and standard lineset kit. |
| Professional Labor & Electrical | $1,500 – $3,800 | Mounting, wall drilling, system evacuation/testing, and running a dedicated 230V circuit from your breaker panel. |
Pro Tip: Keep a close eye on your local utility company’s website and federal energy programs. High-efficiency mini split heat pumps frequently qualify for substantial clean-energy tax credits and instant cash rebates that can shave hundreds—or even thousands—of dollars directly off your final installation bill.
Here is a clear, point-by-point breakdown to help you sort through this next batch of mini split questions.
Are Cozeware Mini Splits Good?
They are a highly competitive option if you are looking for excellent energy efficiency without paying premium brand prices.
- The Good: They feature a modern 20 SEER2 efficiency rating and run incredibly quiet—dropping down to roughly 21 to 31 decibels in sleep mode, which is about the volume of a whisper. They also use R32 refrigerant, which has a much lower global warming footprint than older systems and positions them well for future environmental regulations.
- The Catch: Because they are a newer direct-to-consumer brand, they do not have an established nationwide dealer network. If a component fails under warranty, you will be interacting with online support to get parts shipped to you, and you will need to find your own local technician willing to handle the physical repair.
2. Who Makes Cozeware Mini Splits?
They are manufactured and distributed by YITA LLC. They market their climate control systems as a budget-friendly, direct-to-door retail brand, which keeps overhead low and allows them to sell high-efficiency units at a fraction of the cost of legacy HVAC manufacturers.
3. How Much Area Does a 24,000 BTU Mini Split Cover?
They comfortably handle 1,000 to 1,500 square feet of space.
If you are heating or cooling a large, wide-open floor plan with solid insulation, they easily stretch to the top end of that range. If you are trying to push that air through a house with a layout that is broken up into multiple small rooms with closed doors, you will likely want to look into a multi-zone system instead of relying on a single large wall head.
4. How to Troubleshoot Common Blueridge Mini Split Problems?
Blueridge systems (distributed by Alpine Home Air) feature built-in self-diagnostics. When something skips a beat, they will flash an alphanumeric error code across the front display of the indoor air handler.
If your unit stops conditioning the air or refuses to turn on, use this systematic checklist to safely diagnose the issue before calling in professional reinforcement:
1.Identify the Flashing Error Code:Check the indoor display.
Look closely at the front panel screen. Common Blueridge codes include E1 or E6 (communication breakdown between units), F0 or EL 0C (low refrigerant or potential line leak), and H5 or P0 (intelligent power module overcurrent protection).
2.Perform a Hard Power Cycle:Clear out temporary ghost errors.
Go to your main electrical panel or the outdoor safety disconnect box and flip the dedicated mini split breaker to the OFF position. Leave it completely off for at least 10 full minutes. This gives the massive capacitors on the main control boards time to fully discharge, which resets the system memory and clears out false alerts caused by minor power surges.
3.Inspect and Clear Airflow Restrictions:Clean the filters and coils.
Pop open the front cover of your indoor unit and clean out the mesh dust filters. Next, walk outside and ensure the outdoor condenser fins are completely free of grass clippings, leaves, or cottonwood. Restricted airflow causes the compressor to overheat and draw too much current, triggering an automatic safety shutdown.
4.Verify the Signal Wire Connections:For E1/E6 communication faults.
With the power completely disconnected, remove the small electrical access plate on the side of the outdoor unit. Ensure the 14/4 stranded signal wire connecting the indoor and outdoor terminals has not vibrated loose. A loose screw on terminal number 3 is the leading cause of communication dropouts.
When to call a pro: If your system throws an F0 or EL 0C code, it means the unit has lost its factory refrigerant charge. Do not simply add more gas; a certified technician needs to hook up a nitrogen pressure test to find the leak, repair the connection flare, vacuum the system down, and recharge it by exact weight.
What is a complete list of common Blueridge mini split error codes and their direct meanings?
Blueridge mini split systems use built-in diagnostics to monitor everything from line voltage to tiny temperature variations on the copper coils. When a component operates outside its safe parameters, the system triggers a protective shutdown and flashes an alphanumeric code on the indoor air handler’s digital display.
Because Blueridge systems are built on a highly reliable engineering platform shared with major manufacturers like Midea, their error codes follow a structured layout. They are divided cleanly into indoor failures, outdoor/communication faults, and inverter protection loops.
Master Table of Common Blueridge Error Codes
| Code | What It Means | What’s Happening & Next Steps |
| EL 01 / E0 / E1 | Indoor / Outdoor Communication Fault | The signal link between the two units is broken. This is almost always caused by a loose wire terminal on screw number 3, a broken 14/4 stranded lineset wire, or electromagnetic interference. |
| EL 0C / F4 | Refrigerant Leakage Detected | The indoor coil sensor detects that the temperature is not dropping despite the compressor running full blast. This safety trigger shuts the system down to protect the compressor from burning up due to low refrigerant levels. |
| EH 03 / E6 | Indoor Fan Speed Error | The indoor blower wheel has dropped below its targeted speed for more than a minute. Check for a physical obstruction blocking the wheel, a disconnected fan motor wiring harness, or a dead fan motor capacitor. |
| EH 00 / EE | EEPROM Parameter Error | The main control board’s non-volatile memory chips have suffered a software corruption or data mismatch. Power down the system completely at the breaker for ten minutes to force a hard reboot. If it returns, the board needs replacement. |
| EH 60 / E1 | Indoor Room Temperature Sensor (T1) Fault | The ambient air thermometer located just behind the front plastic intake grille is unplugged, open-circuited, or showing a resistance reading completely out of spec. |
| EH 61 / E2 | Indoor Coil Temperature Sensor (T2) Fault | The copper clip-on sensor tracking the internal evaporator coil temperature is damaged or disconnected. This sensor protects the indoor unit from icing up. |
| EC 52 / E3 | Outdoor Coil Temperature Sensor (T3) Fault | The sensor attached directly to the outdoor condenser coils is failing. The system uses this reading to determine exactly when to go into defrost mode during the winter. |
| EC 53 / E7 | Outdoor Ambient Temperature Sensor (T4) Fault | The air thermometer attached to the back metal grille of the outdoor unit is giving inaccurate readings or has failed completely. |
| PC 00 / P0 | IPM Module Malfunction / Overcurrent | The Intelligent Power Module on the outdoor board is overheating or pulling a massive surge of electricity. This can be caused by a dying outdoor fan motor, blocked air vents, or a short circuit inside the compressor itself. |
| PC 01 / P1 | Over-Voltage or Under-Voltage Protection | The incoming main line voltage from your electrical panel has spiked too high or dropped too low for safe operation. The system automatically locks out until the household power stabilizes. |
| PC 04 / P4 | Inverter Compressor Drive Error | The outdoor motherboard’s main control chip has lost synchronization with the inverter compressor. This indicates a bad inverter driver board or a mechanical breakdown inside the compressor compressor pump. |
The Universal Mini Split First Aid Step: Before buying parts or taking off panels, always perform a hard reset. Go to your outdoor disconnect box or your home’s main breaker panel, flip the mini split breaker to OFF, and leave it off for a full 10 minutes. This allows the massive capacitors on the control boards to bleed out all electrical charge, completely wiping away minor “ghost errors” caused by neighborhood grid fluctuations.
Before You Click Buy: Sizing, Shipping, and the Fine Print
Before you drop your hard-earned cash on a major home upgrade like this, you need to know exactly what you are getting into regarding sizing, delivery, and what happens if you need to send it back. Let’s break down the crucial logistics so you don’t hit any unexpected snags.
Choosing the Right Size (Don’t Guess on BTUs)
Real talk: picking the wrong size mini split will ruin your experience. If you buy a unit that is too small, it will run constantly, skyrocket your electric bill, and still leave you sweating. If it is too massive, it will cycle on and off too quickly (short-cycling), which destroys its ability to dehumidify the air, leaving your room feeling like a cold, damp cave.
While this 24,000 BTU model is the heavy lifter of the lineup, here is how Cozeware structures their baseline sizing requirements:
| Room Size (Sq Ft) | Recommended BTU Capacity | Typical Space Matchup |
| 150 – 450 | 9,000 BTU | Tiny home, home office, small bedroom |
| 450 – 750 | 12,000 BTU | Standard primary bedroom, mid-sized living room |
| 750 – 1,250 | 18,000 BTU | Large family room, open loft apartment |
| 1,250 – 1,500+ | 24,000 BTU | Large open-concept layouts, small whole homes |
The Real-World Adjustments
Do not just rely on square footage alone. Your actual room layout changes the math. If your home has any of the following factors, you need to adjust your baseline calculations:
- High Ceilings: If your ceilings are taller than 8 feet, add an extra 10% to your BTU target for every 2 feet of extra height.
- Poor Insulation: Living in an older home with drafty windows? Bump your BTU requirements up by 15% to 20% to compensate for lost air.
- Extreme Climates: If your summer days regularly cross the 90°F mark, or your winters drop below 20°F, you will want to lean toward a higher capacity unit to ensure the system can keep pace without overworking the compressor.
When you are picking out a new air conditioner, relying solely on square footage can leave you sweating. Air conditioners do not cool flat surfaces—they cool a three-dimensional volume of air. If you have high ceilings, open lofts, or rooms flooded with direct afternoon sunlight, a standard floor-area calculation will almost always leave your system undersized.
To get your cooling sizing right, you need to account for the “z-axis” (your ceiling height) alongside real-world heat factors like insulation, windows, and daily occupancy.
The Three-Step Sizing Process
Step 1: Calculate Your True Room Volume
Before looking at units, grab a tape measure and find the total cubic space of your room. Multiply the length by the width to get your square footage, then multiply that number by the actual ceiling height.
$$\text{Room Volume (Cubic Feet)} = \text{Length} \times \text{Width} \times \text{Ceiling Height}$$
Step 2: Convert Volume to Base BTUs
A solid rule of thumb for standard residential spaces is to allocate roughly 4 to 5 BTUs of cooling power per cubic foot of air. This provides a baseline capacity to lower the air temperature efficiently.
Step 3: Apply Real-World Heat Modifiers
The environment inside and outside the room applies a constant “heat load” that your AC must fight against. Adjust your base BTU calculation using these real-world conditions:
- Sun Exposure: If the room faces west or features large, unshaded windows that catch intense afternoon sun, bump your capacity up by 10% to 15%.
- Top Floor/Roof Contact: Rooms directly beneath an uninsulated roof or attic absorb massive amounts of radiant heat. Add 10% to your total.
- Occupants and Electronics: Humans generate roughly 400 BTUs of heat per hour. High-end gaming PCs, appliances, and home servers generate even more. Add 400 BTUs for each regular occupant beyond two people, and an extra 500 to 1,000 BTUs if the room houses high-heat electronics.
AC Sizing Cheat Sheet: Volume to BTUs
This reference table maps out standard room dimensions and volumes to their required cooling capacities, tracking both standard spaces and high-heat environments.
| Floor Area (Sq. Ft.) | Room Volume (Cubic Ft. @ 8ft Ceiling) | Room Volume (Cubic Ft. @ 10ft Ceiling) | Base Cooling Needed (Standard Room) | High Heat Load Needed (Sunny / High Ceilings) | Common Unit Size (Tons) |
| 100 – 150 | 800 – 1,200 | 1,000 – 1,500 | 5,000 – 6,000 BTU | 7,000 – 9,000 BTU | 0.5 to 0.75 Ton |
| 150 – 250 | 1,200 – 2,000 | 1,500 – 2,500 | 6,000 – 9,000 BTU | 9,000 – 12,000 BTU | 0.75 to 1.0 Ton |
| 250 – 400 | 2,000 – 3,200 | 2,500 – 4,000 | 9,000 – 12,000 BTU | 12,000 – 15,000 BTU | 1.0 to 1.25 Ton |
| 400 – 550 | 3,200 – 4,400 | 4,000 – 5,500 | 12,000 – 14,000 BTU | 15,000 – 18,000 BTU | 1.25 to 1.5 Ton |
| 550 – 700 | 4,400 – 5,600 | 5,500 – 7,000 | 14,000 – 18,000 BTU | 18,000 – 24,000 BTU | 1.5 to 2.0 Ton |
Pro Tip: Avoid the Over-Sizing Trap
When your calculation falls right on the border between two sizes, it is usually smart to choose the next size up so the room cools down quickly. However, do not overdo it. If you put a massive 24,000 BTU unit in a tiny 200-square-foot room, the system will face “short-cycling.” It will cool the air so fast that it shuts off before it has a chance to pull moisture out of the air, leaving you with a room that feels cold, damp, and clammy.
Balancing Upfront Costs vs. Efficiency Ratings
When shopping for your unit, you will encounter efficiency stickers showing SEER2 or star ratings.
- High Efficiency (5-Star / 20+ SEER2): These units carry a higher upfront retail price but use significantly less electricity. If you plan to run your AC for six to twelve hours a day all summer long, the monthly power savings will pay back the price premium within a couple of seasons.
- Standard Efficiency (3-Star / 14-16 SEER2): These systems are far cheaper to buy out of the box. If you only use the AC lightly during peak heat waves, or if it is installed in a guest bedroom or garage workshop that is rarely occupied, a standard efficiency model is often the most cost-effective choice.
Pro Tip: Leverage Free Tech Before Buying
If you have a modern iPhone, you can use automated sizing apps like ClimaScan. They utilize integrated spatial sensors to scan your actual walls and windows natively on your device, instantly calculating a highly accurate cubic volume and estimating your ideal BTU target without pulling out a manual notepad.
Shipping Expectations: Speed and Exclusions
Cozeware operates eight different warehouses across the United States. When you place an order, they automatically ship the unit from the hub closest to your delivery address to keep transit times as short as possible.
- The Carrier: Everything ships via FedEx Ground (Monday through Friday) or FedEx Home Delivery (seven days a week).
- Transit Window: You can generally expect your boxes to arrive within 3 to 7 business days under normal conditions.
- The Catch: They offer free shipping to most of the continental US, but they cannot ship to P.O. Boxes. Additionally, if you live in remote areas or outside the lower 48—including Alaska, Hawaii, Puerto Rico, Guam, or an APO/FPO military address—you are unfortunately out of luck, as they do not deliver to these zones.
The Return Policy: Know the Catch
Cozeware offers a 30-day worry-free return policy, but you need to read the fine print carefully because an air conditioner isn’t like returning a pair of shoes.
The Golden Rule: Once you install the product, it is no longer eligible for a standard return or exchange unless it has a verified manufacturing defect. Inspect the unit thoroughly before your HVAC tech mounts it to the wall.
If you change your mind and decide to return the unit while it is still brand new, uninstalled, and in its box, keep these rules in mind:
- The Restocking Fee: If you are returning the unit simply because of buyer’s remorse (and not a quality issue), they will deduct a 20% restocking fee straight from your refund to cover warehouse processing costs.
- Packaging Matters: The unit must be in pristine condition with absolutely zero scratches, stains, or modifications. It must also include all of the original factory packaging. If you throw away the original box, you might forfeit your refund entirely.
- The Window: Once your return is approved, you have exactly 14 days to get it shipped back to their warehouse using the provided authorization label.
Warranty Security & Customer Care
If the unit experiences an actual component failure down the road, their limited factory warranty steps in to protect your investment. As long as you bought the unit directly from them and didn’t use an unauthorized third-party reseller, you are covered for 5 years on all parts and 7 years on the compressor.
Just remember that this coverage only protects you against genuine manufacturing or material defects. If the unit fails because of a sloppy DIY installation, poor maintenance, or a massive storm surge, the warranty is void.
Should anything go sideways, you can open a claim by shooting an email to service@cozeware.com with your order number and photos of the issue. Their team typically responds within 24 to 48 hours. If you prefer a live human voice, you can hit up their customer support line at +1 877-801-8599 from Monday through Friday, between 9:00 AM and 6:00 PM Eastern Time.
Final Verdict
The COZEWARE E-Save Series 24000 BTU Mini Split successfully bridges the gap between high-end smart features and budget-friendly climate control. Its AI-optimized operation removes the annoying temperature swings common with older units, and the 36 dB sleep mode is an absolute game-changer for anyone sensitive to noise.
Just keep in mind that you will need a dedicated 230V line and must supply your own power cord. If you are ready to upgrade your home comfort before the peak summer heat waves roll in, take advantage of the 15% off price drop during their Summer Kickoff Event to secure the best price guaranteed with their solid 7-year compressor warranty.