Most people who take their physical recovery seriously eventually fall into a miserable daily routine. They wake up early, drive to the local gas station or grocery store, haul three to four heavy bags of dripping ice back to their house, and dump them into a makeshift tub. Ten minutes later, they are staring at a lukewarm pool of water that barely registers below 55°F.
It is exhausting, incredibly expensive over time, and a massive waste of energy.
The cold therapy world has largely shifted away from this chaotic ice-hauling routine for one simple reason: high-efficiency water chillers. Instead of turning cold therapy into a part-time job, a dedicated machine turns your setup into an automated, reliable utility. Shoppy Express spent weeks looking at the mechanics behind modern recovery setups to understand how these machines pull off this ice-free magic, specifically analyzing the heavy-duty performance of professional-grade units.
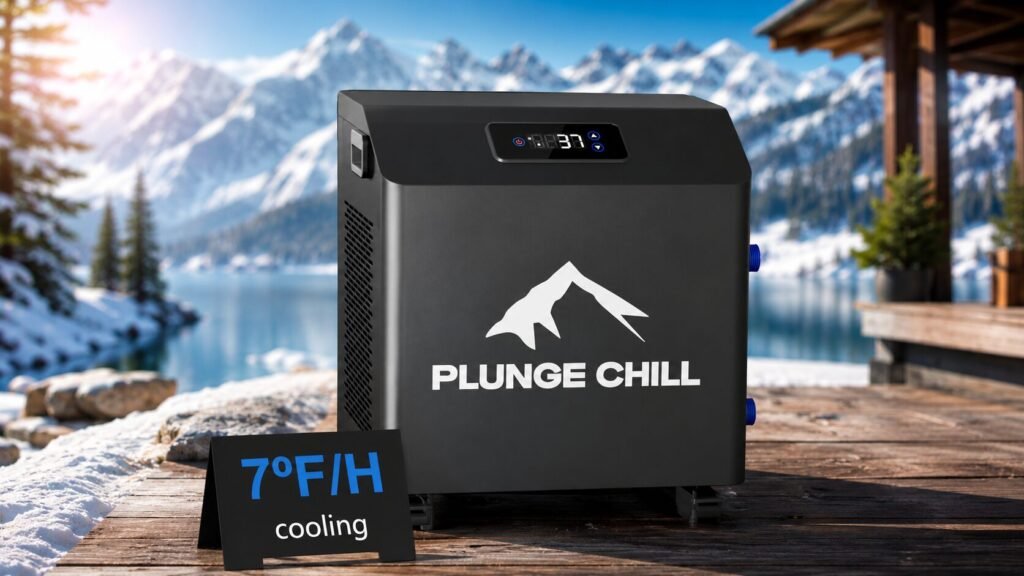
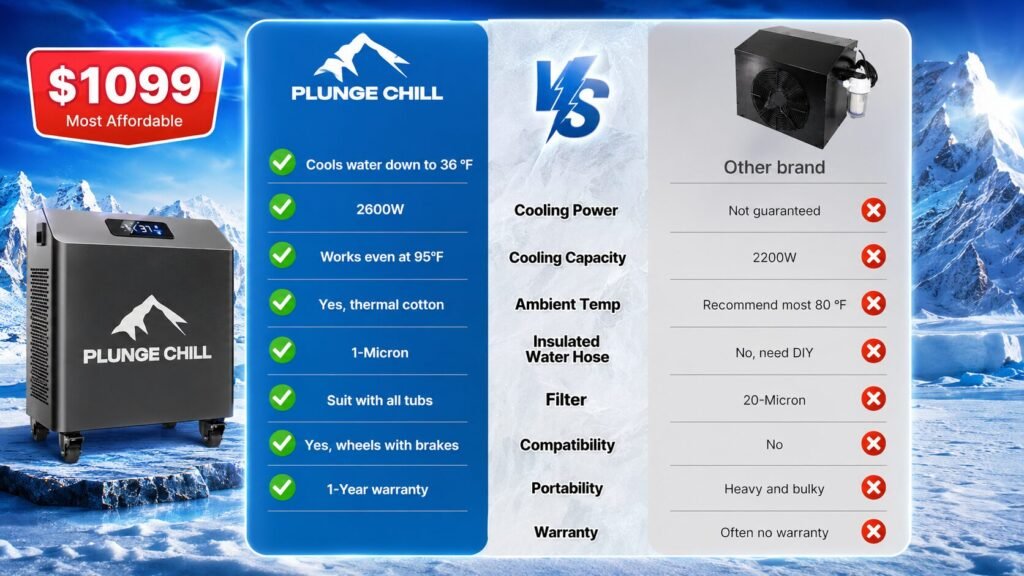
If you want to stop throwing money away on temporary ice cubes, the Plunge Chill Anniversary Sale is currently live, bringing their flagship commercial-grade unit down from its regular retail price of $2,199.00 to a highly accessible sale price of $1,099.00 with free fast shipping from their U.S. warehouse. Even better, typing in the sitewide coupon code Extra10 at checkout knocks an additional 10% off the final price.

Technical Specifications: The 1HP Plunge Chill System
To understand why a heavy-duty cooling unit outperforms standard gym setups, you have to look directly at the underlying hardware. This specific unit features a 4.8 out of 5-star rating based on 223 verified customer reviews, positioning it as a highly reliable option for home and light commercial spaces.
| Product Feature | Technical Specification |
|---|---|
| Regular Price | $2,199.00 |
| Current Sale Price | $1,099.00 (Plus 10% off with code Extra10) |
| Compressor Power | 1 HP (High-efficiency Japanese core) |
| Max Cooling Capacity | 2600W |
| Minimum Temperature | 36°F (2.2∘C) |
| Cooling Speed | Drops a 110-gallon tank from 80°F to 40°F in approx. 8 hours |
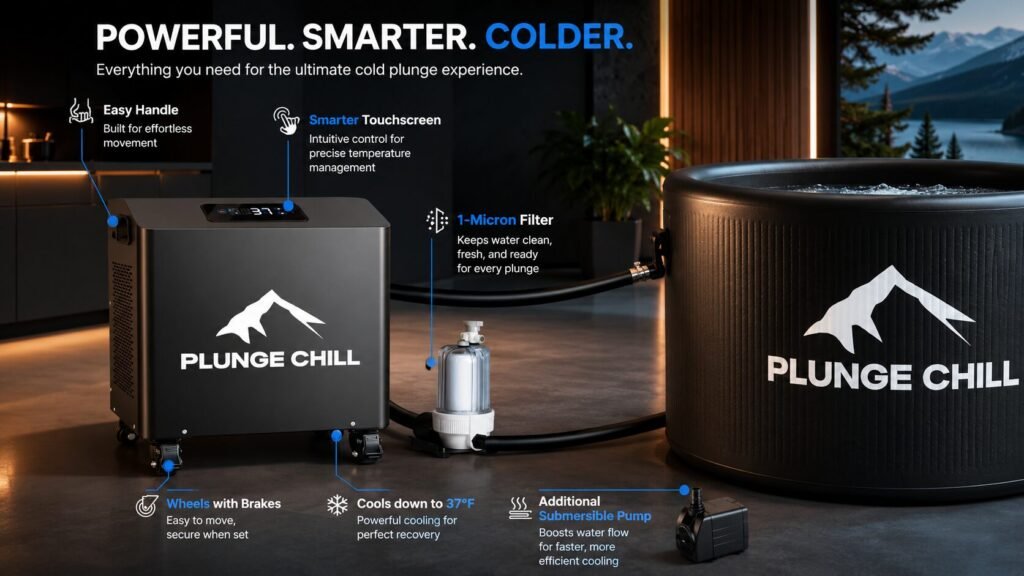
| Filtration System | Built-in inline 1-micron precision cartridge |
| Dimensions | 16.5″ (L) × 13.8″ (W) × 18.9″ (H) |
| Total Weight | 73 lbs (Equipped with integrated caster wheels) |
| Heat Exchanger | 20-ft Commercial titanium coil + American aluminum condenser |
| Refrigerant Type | Eco-friendly R410A |
| Housing Construction | Weather-tested casing for indoor/outdoor integration |
Technical Comparison: 1 HP vs. 1/3 HP Chillers
Choosing the wrong size motor is the single biggest mistake people make when building a home recovery system. An underpowered motor will run constantly, driving up your electric bill while failing to hit truly low temperatures during hot summer months.
| Performance Metric | Entry-Level 1/3 HP Chiller | Professional-Grade 1 HP Chiller |
|---|---|---|
| Lowest Achieveable Temp | 42°F | 36°F |
| Max Cooling Volume | Up to 66 Gallons | Up to 200 Gallons |
| Cooling Power Output | 600W | 2700W |
| Motor Longevity Rating | 12,000 Hours | 20,000 Hours |
| Max Ambient Operating Temp | Up to 85°F | Up to 95°F (Built for hot climates) |
| Outdoor Weather Testing | Basic protection | Heavy-duty weather-resistant casing |
Part-by-Part Engineering: How a Chiller Extracts Heat
A premium water chiller does not actually generate “coldness.” Instead, it is a highly sophisticated heat-extraction loop that works identically to an industrial refrigerator or air conditioner. Understanding the layout of these internal components explains why the water stays flawlessly clean and crisp.
The Intake, Pump, and 1-Micron Filtration Loop
Water is continuously drawn out of your tub via a dual-pump compatibility design that accommodates both internal and submersible pumps. Before the water ever touches the cooling elements, it passes through a 1-micron inline sediment filter. This ultra-fine precision mesh catches hair, dead skin cells, and ambient body oils.
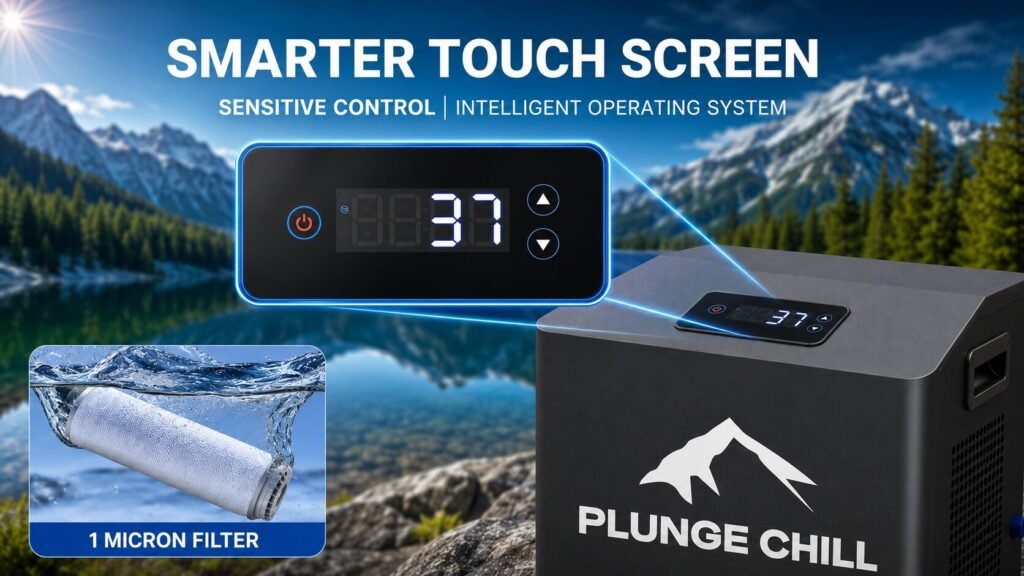
Maintaining your body’s physical health requires clean recovery tools. Just as using a low-impact home cardio setup like the one detailed in the Toputure Review 2026: Best Walking Pads & Exercise Bikes for Home Office Fitness (Tested) keeps your daily activity levels pristine without joint wear, a 1-micron filter ensures you aren’t soaking in a breeding ground for bacteria.
The Evaporator and Titanium Exchange Coil
Once filtered, the clean water streams into the core heat exchanger. This component features a massive, 20-foot commercial-grade titanium coil. Titanium is utilized because it is entirely impervious to the corrosive effects of water sanitizers, salts, and organic compounds. Inside this sealed coil, an eco-friendly R410A liquid refrigerant is rapidly expanding into a gas. As it expands, it pulls the thermal energy (heat) directly out of the passing water through the metallic walls, dropping the water temperature down to a bone-chilling 36°F.
The Compressor, Condenser, and Air Evacuation System
The gas refrigerant, now holding the heat from your bath, travels to the Japanese-engineered high-efficiency compressor. The compressor tightly squeezes the gas, raising its temperature and pressure significantly.
From there, it enters an American-made aluminum condenser where a heavy-duty cooling fan blows the trapped heat clean out of the machine’s exhaust vents and into the surrounding room air. The refrigerant cools back down into a liquid, passes through an expansion valve, and resets the loop to do it all over again.
Advanced Structural Health Benefits
Automating your cold therapy routine does more than save your wallet from the local ice supplier—it allows you to unlock consistent physiological adaptations that can significantly improve your quality of life.
- Systemic Inflammation Management: Immersing yourself in 36°F to 45°F water forces immediate vasoconstriction, clamping down peripheral blood flow to shunt blood to your core. This mechanically limits cellular swelling, drastically accelerating muscle recovery times after brutal training blocks.
- Parasympathetic Nervous System Optimization: Forcing yourself to slow your breathing while submerged in freezing water activates the vagus nerve. This down-regulates stress hormones like cortisol and promotes a deep parasympathetic state, which directly leads to improved sleep latency and deeper REM cycles.
- Neurochemical & Metabolic Reset: Cold shock triggers a massive, prolonged release of norepinephrine and dopamine, sharpening your mental clarity and baseline focus for hours after stepping out. Additionally, your body utilizes significant caloric energy via non-shivering thermogenesis to maintain its core temperature, stimulating metabolic efficiency.
For individuals navigating severe localized structural alignment issues, pairing systemic cold therapy with targeted deep tissue pressure yields incredible results. Those managing intense lumbar strain often look toward specialized recovery furniture, as noted in the comprehensive RealRelax PS5200 4D Review: Can It Really Fix Your Back Pain?, which highlights how addressing spinal tension alongside regular cold immersion completely changes long-term pain management.
Science-Backed Reasons to Start Cold Plunging Every Day
The Neurological Shockwave: Instant, Sustained Energy

Forget the third cup of cold brew that leaves you jittery and crashing by mid-afternoon. Stepping into freezing water triggers an immediate, involuntary survival mechanism. Your brain instantly floods your system with norepinephrine and adrenaline. This isn’t an artificial chemical spike; it is a clean, completely natural biological wake-up call. The sudden rush sharpens executive focus, expands your lung capacity, and leaves you feeling completely revitalized and alert for hours without any post-caffeine side effects.
The Sleep Switch: Mastering Your Autonomic Nervous System

High-quality sleep isn’t about luck; it relies heavily on core body temperature drops and nervous system regulation. The thermal shock of a cold plunge forces your autonomic nervous system—the command center responsible for your daily stress response—to adapt and strengthen. By systematically exposing your body to this controlled stressor, you build a higher threshold for anxiety and tension. This shift activates your parasympathetic nervous system, lowering active cortisol levels and dropping your core temperature, creating the exact biological environment your brain needs for deep, restorative sleep.
Cellular Defense: Upgrading Your Immune Function
Taking a daily dip does serious undercover work for your internal biology. Cold water immersion causes your lymphatic system to rapidly contract, acting like a manual pump that flushes fluid through your lymph nodes to efficiently detoxify the body. Simultaneously, the cold exposure stimulates the production of leukocytes, which are the critical white blood cells tasked with fighting off everyday infections. Consistent cold therapy has been shown to optimize overall immune function, significantly lowering the frequency and severity of seasonal upper respiratory tract issues.
The Neurochemical Reset: Defeating Daily Stress and Anxiety

If you are operating in a high-stress environment, your body’s baseline cortisol levels are likely stuck in overdrive. Cold water therapy acts as an immediate physical reset button for your brain chemistry. Submerging yourself forces a dramatic reduction in active stress hormones while helping balance the foundational hormone fluctuations that frequently contribute to seasonal blues and daily anxiety. Learning to control your breath under the freezing pressure builds an absolute fortress of mental resilience, making everyday real-world stressors feel incredibly manageable.
Rapid Recovery: Bringing Elite Sports Medicine Home
There is a distinct reason professional training facilities across the country house heavy-duty cold tubs. Cold therapy remains the absolute gold standard for athletic muscle recovery. The freezing environment forces peripheral blood vessels to rapidly constrict, which mechanically drives down localized tissue inflammation, limits cellular swelling, and promotes efficient metabolic waste removal. The moment you step out, oxygen-dense blood rushes back into your muscles, drastically shortening recovery windows and mitigating the effects of delayed onset muscle soreness (DOMS).
Biological Momentum: Hijacking Your Motivation Molecule

Perhaps the most powerful hidden benefit of a dedicated cold routine is its long-term impact on your baseline dopamine levels. Dopamine is the primary neurochemical engine behind human motivation, baseline focus, and our threshold for taking action. Unlike the short, volatile dopamine spikes you get from picking up your phone or eating processed sugars—which always lead to an immediate emotional crash—a cold plunge triggers a slow, steady release of dopamine that remains elevated for hours. This clean neurochemical elevation builds incredible mental discipline, helping you build unstoppable daily momentum.
Pros and Cons
Pros
- True Ice-Free Consistency: Keeps up to 110 gallons of water completely frozen at a stable 36°F to 40°F year-round, completely eliminating store runs for ice.
- Industrial Material Selection: Built with a premium Japanese compressor and a 20-foot USA-made titanium heat exchange coil that resists corrosion indefinitely.
- Intelligent Self-Maintenance: The one-button drain and advanced air venting system make flushing the machine incredibly easy, while the rear reset switch keeps the electrical circuits protected from power surges.
- Exceptional Climate Adaptability: The 1HP motor produces 2600W of pure cooling power, allowing it to maintain sub-40°F temperatures even when placed outside on a scorching 95°F summer day.
Cons
- Hefty Initial Footprint: Weighing in at 73 lbs, this unit requires some physical muscle to unbox and set up, though the integrated caster wheels make rolling it across patios or gyms simple.
- Exhaust Clearance Required: Because the powerful fan expels high amounts of extracted heat, you must leave at least two feet of clear space around the machine’s vents when setting it up indoors or in tight spaces.
Who is the Plunge Chill 1HP Unit Best For?
You should buy this if:
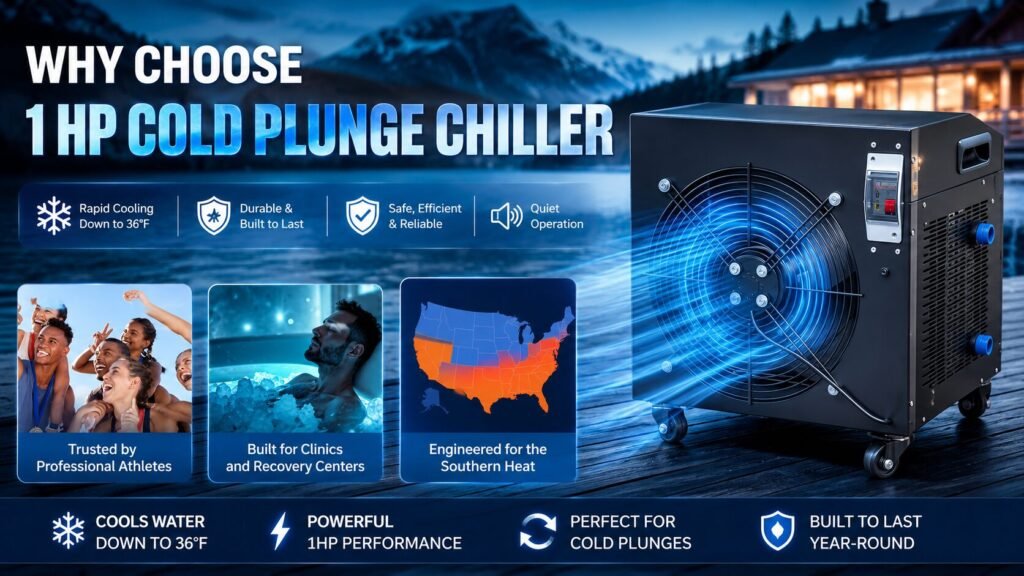
- You live in a hot southern climate: If you live in regions like Texas, Florida, or Arizona, smaller 1/3 HP chillers will struggle and constantly freeze up. This 1HP unit is explicitly engineered to handle high ambient outdoor temperatures without losing efficiency.
- You have a large custom tub or barrel: With the capacity to effortlessly chill setups up to 110 to 200 gallons, this unit fits everything from oversized luxury tubs to vertical deep-immersion barrels.
- You demand clinical-grade temperatures: If you aren’t satisfied with a lukewarm 50°F dip and want a true, athlete-level 36°F shock to maximize cellular recovery, this commercial compressor is built for that exact job.
Proactive recovery choices carry over into every athletic discipline. For instance, athletes working on serious lower-body power often combine intense leg workouts with targeted joint protection, a philosophy discussed in the Rage R2 Sled Review: The Secret to Bulletproof Knees?, proving that using heavy-duty, performance-grade tools across your entire regimen is what keeps you performing at your absolute peak.
You should skip this if:
- Your setup is strictly for small indoor apartments: If you have zero patio space and are trying to cool a tiny, 40-gallon pop-up tub inside a small bathroom, a 1HP motor is likely overkill. A smaller, lighter unit would be easier to store.
- You travel constantly and need portability: At 73 lbs, this machine is a permanent powerhouse designed to stay anchored to your dedicated home wellness center or training room rather than being thrown into the trunk of a car every weekend.
Complete 1HP Cold Plunge Chiller Setup, Programming, and Field Manual
Investing in a heavy-duty 1HP cold plunge chiller is the ultimate commitment to a seamless, ice-free recovery routine. Built to deliver massive thermal drops quickly, this powerhouse eliminates the logistical nightmare of hauling ice bags. Whether setting up an elite recovery space in a commercial training center, a backyard patio layout, or an indoor wellness bathroom remodel, proper installation and programming are essential to get the most out of your system.
The technical review team at Shoppy Express compiled this comprehensive operational guide to help you master your 1HP system, optimize water flow, and troubleshoot like a field technician.
Technical Specifications: 1HP System Layout
Before diving into installation, it helps to understand the commercial-grade engineering powering your recovery setup. This 1HP unit is a highly efficient appliance designed for rapid cooling and continuous climate control:
| System Component | Engineering Specification |
| Cooling Performance | Max 2600W output powered by a 1 HP compressor |
| Cooling Velocity | Drops 110 gallons of water from 80°F to 40°F in roughly 8 hours |
| Minimum Safe Limit | 36°F absolute floor without freezing internal plumbing |
| Core Hardware | High-efficiency Japanese compressor + USA-made 20-ft titanium coil heat exchanger |
| Refrigerant Core | High-performance, eco-friendly R410A |
| Physical Dimensions | 16.5″ L × 13.8″ W × 18.9″ H |
| Total Net Weight | 73 lbs (equipped with heavy-duty caster wheels for mobility) |
| Filtration Core | Built-in inline filter assembly with 1-micron sediment precision |
| Electrical Safety | Rear-mounted manual circuit protection reset switch |
Mastering the Interface and Screen Programming
The digital interface controls your temperature cycles and system protection loops. Ensure your water lines are completely flooded and primed before executing these programming commands to protect the internal mechanics.
1. Powering On the Control Panel
- Plug the chiller into a dedicated, grounded outlet.
- Press and hold the Power Button until the LED display brightens.
- The screen will instantly reflect your active, real-time water temperature.
- Note: If the display reads “OFF”, the machine is receiving power safely but is resting in standby mode.
2. Programming the 45°F to 50°F Optimal Window
To prevent your 2600W compressor from constantly turning on and off over small fractional temperature changes, configure a dedicated thermal buffer window:
- Tap the Up or Down arrows to adjust your baseline target temperature to 45°F.
- Press and hold the Up and Down arrows simultaneously until the interface switches into advanced mode, displaying the menu code F01.
- Modify the F01 value to 5°F.
- Tap the Power Button once to confirm, save, and exit.
- How this works: The chiller will rapidly drop your water to 45°F and sleep efficiently. It will not engage the cooling loop again until ambient room temperature nudges the water back up to 50°F, protecting your motor from short-cycling.
3. Screen Status Codes and Safety Lockouts
- The Blinking Fan Icon (Delay Mode): The machine features a built-in 3-minute safety delay loop to protect electrical circuits from sudden power drops or surges. If the fan icon blinks, the system is safely timing out before firing up the compressor.
- The Automatic Panel Lock: To prevent accidental setting changes while moving around your space, the controller locks itself down after 30 seconds of inactivity (indicated by a lock icon).
- How to Unlock: Press and hold the Power Button + Down Arrow together for 5 seconds to clear the lock icon and adjust settings.
Plumbing Blueprint A: Connecting to Tubs with Built-In Ports
This configuration is optimized for specialized recovery pods or inflatable tubs equipped with pre-molded, threaded water connection ports.
Step 1: Assemble the External Filtration System
- Place the external pump and filter housing onto the heavy-duty metal base plate and secure them tightly using the provided mounting screws.
- Carefully locate the clearly stamped Pump IN and Pump OUT ports on your filter framework.
- Thread the specialized air release valve directly into the top port of the filter housing. This valve is critical for bleeding out performance-choking airlocks later.
Step 2: Route Your Insulated Hoses
Correct layout paths prevent backpressure issues and optimize your 1HP cooling velocity:
- Hose 1 (Short): Connect the Pump OUT port straight to the lower Chiller IN connection.
- Hose 2 (Long #1): Route from the Chiller OUT port directly to your Tub Inlet port.
- Hose 3 (Long #2): Route from the Tub Outlet port straight to the Filter IN connection.
Pro Tip: Cleanly wrap all exposed male threaded connectors with the included waterproof plumbing tape before tightening. Ensure your hoses travel along wide, natural arcs—any sharp 90-degree bends or twisted insulation lines will heavily restrict water flow.
Step 3: Flood the Lines and Fire Up
- Plug the external pump’s power cable directly into the dedicated power receiver port on the back of the chiller unit.
- Open the mechanical valves on your tub walls to let water naturally gravity-flood down through your hoses and fill the filter canister.
- Crack open the air release valve on top of the filter housing. You will hear a loud hissing sound as trapped air escapes. Once a small trickle of water appears, seal the valve tight.
- Turn on the main power switch. The internal logic boards will auto-start your pump loop, check pressure balances, and engage the cooling cycle.
Plumbing Blueprint B: Retrofitting Traditional Home Bathtubs (No Ports)
If you are executing an indoor bathroom remodel or want to convert an existing residential porcelain, acrylic, or cast-iron bathtub into a recovery setup, use the included high-volume submersible pump to pull water over the rim.
Step 1: Mount the External Module
- Set your filter housing and primary circulation pump onto the base frame, fastening them securely with the provided hardware and a screwdriver.
- Keep this external assembly resting flat on a level surface directly adjacent to your bathtub footprint.
Step 2: Map Your Three Insulated Lines
- Short Hose A: Attach the 1/2-inch female connector end to the Pump OUT port, and connect the 3/4-inch female end to the Chiller IN port.
- Long Hose B: Connect one end to the Chiller OUT port and drop the loose return end directly over the rim into the bottom of your bathtub.
- Long Hose C: Connect one end to the external Filter IN port. Connect the opposite end securely to the outlet nozzle of the secondary submersible pump. Lower the submersible pump entirely into your bathtub until it rests fully underwater at the deep end.
Installation Hack: If the thick, insulated hoses feel too rigid to slide onto the pump or fittings during a tight bathroom layout, use a hair dryer to gently warm the plastic ends for 30 seconds. The vinyl will soften, slide on effortlessly, and cool to create a highly secure seal. Trimming or cutting your hoses down to cleanly fit your bathroom dimensions will not affect your warranty or return options.
Step 3: Start the Cycle
- Plug the pump power cord directly into the chiller’s integrated power port.
- Ensure your filter canister valves are closed completely.
- Fill your home bathtub until the submersible pump is buried under at least 4 inches of water.
- Turn on the chiller. The system will automatically engage the submerged pump, draw water up over the rim, filter it, pass it through the 1HP compressor core, and return it icy cold.
Technical Troubleshooting and Field Diagnostics
If your 1HP system displays a low-flow warning, fails to decrease water temperatures, or drops in pressure, use this technician diagnostic matrix before calling support.
Symptom 1: Water Temperature Does Not Decrease
- Extreme Ambient Overheating: The 1HP system is robust but requires proper ventilation. If operating outdoors on a hot patio, ensure ambient temperatures around the machine stay below 95°F (35°C). Move the chiller out of direct, pounding sunlight and into a shaded area.
- Trapped Exhaust Air: Never place your chiller inside a tight bathroom vanity or a closed storage cabinet. The 2600W system expels intense heat. If the hot exhaust air loops back into the intake vents, the machine will short-cycle to prevent internal damage. Maintain at least 12 inches of open air clearance on all sides.
- Thermal Mass Overload: This unit is optimized to rapidly cool volumes up to 110 gallons. If you hooked it up to a massive 300-gallon custom pool, the thermal load will outpace the cooling cycle. Downsize your vessel or reduce total water capacity.
Symptom 2: Water is Not Circulating or Flow Rate is Low
- The Filter Airlock: If you recently cleaned the system, an invisible air pocket might be trapped inside the filter housing. Turn off the machine, open the top air release valve until a smooth stream of water flows out, seal it, and restart.
- Clogged 1-Micron Cartridge: This high-precision filter catches microscopic debris, hair, and body oils incredibly fast. A heavily restricted filter slows down your gallons-per-minute (GPM) flow rate, causing the chiller’s safety shutoff to trip. Remove, clean, or replace the cartridge weekly.
- Internal Pump Lockup: If the pump is plugged in but not humming, disconnect the power cord from the chiller housing, wait 10 seconds to drain any residual capacitance, and plug it firmly back into the outlet port to hard reset the internal impellers. Check that your tub’s mechanical inline valves are turned completely to the open position.
For those tracking performance across multiple lifestyle interests, precise equipment preservation is always the common denominator for success. Whether you are investigating the structural mechanics of sports gear in the Is Dunlop 2026 the Comeback of the Year? The FX 500 & ZXiR Irons Review or discovering why advanced design tolerances prevent equipment failures as detailed in Why Your Stock Shaft Fails—And How Jupiter Lite 9 Wood Fixes It, high-end engineering always pays dividends.
Even minor lifestyle gear modifications follow this rule—whether you are maximizing your hydration efficiency using tools like the ones analyzed in the Riptide Shotgun Bottle Review 2026: I Tried It… This Feature Changes Everything or optimizing your muscle recovery, investing in professional-grade gear completely transforms your day-to-day results.
Ditching daily store runs for ice doesn’t always require a massive commercial-grade infrastructure. For compact recovery setups, personal home gyms, or standard portable pods up to 66 gallons, a highly efficient 1/3 HP chiller provides a reliable, automated alternative to throwing money away on melting ice cubes. Expect an average daily electricity cost of just $0.80 to $1.50, which keeps your recovery routine sustainable over the long haul.
This comprehensive operational blueprint details the exact steps needed to configure, plumb, and troubleshoot a 1/3 HP cold plunge chiller system.
1/3HP Water Chiller Setup and Operation Guide
Before configuring the digital controller, ensure the system is completely flooded with water. Running the internal 600W compressor or circulation pump completely dry can cause immediate component damage.
Step 1: Powering On the System
- Plug the heavy-duty power cable into a dedicated grounded outlet.
- Press and hold the Power Button until the LED interface illuminates.
- The screen will immediately display your current water temperature reading.
- Note: If the display reads “OFF”, the machine hasn’t broken; it is simply sitting in standby mode waiting for input.
Step 2: Programming the 45°F to 50°F Optimal Window
To prevent the compressor from constantly turning on and off every time the water shifts by a fraction of a degree, program a standard thermal buffer window:
- Tap the Up or Down arrows to adjust your target baseline temperature to 45°F.
- Press and hold the Up and Down arrows simultaneously until the screen enters the advanced configuration menu showing code F01.
- Adjust the F01 value to 5°F. This creates a 5-degree operational swing.
- Press the Power Button once to save and lock in the settings.
- How this works: The chiller will now rapidly cool your tub down to 45°F, power down its cooling loop to save electricity, and will not kick back on until ambient heat causes the water to rise back up to 50°F.
Step 3: Navigating Screen Icons & Smart Lockouts
- The Blinking Fan Icon (Delay Mode): The chiller is engineered with a built-in 3-minute compressor delay to protect internal electrical circuits from sudden power surges. If the fan icon flashes, the system is safely timing out before engaging the cooling cycle.
- The Automatic Panel Lock: To prevent accidental setting adjustments while moving around the gym or patio, the control panel automatically locks down after 30 seconds of inactivity (indicated by a lock icon).
- How to Unlock: Simply press and hold the Power Button + Down Arrow together for 5 seconds to regain full access to the menu.
Physical Plumbing Installation Blueprints
The setup sequence varies depending on whether you are connecting the chiller to a specialized recovery pod or retrofitting a standard household bathroom tub.
Option A: Connecting to Tubs and Pods with Pre-Built Ports
This layout utilizes the internal 24/7 circulation pump and pre-fitted 1/2-inch male thread adapters to create a clean, closed-loop cycle.
- The Bottom Intake Line: Connect your first insulated thermal hose from the bottom water outlet valve on your plunge pod directly to the lower port marked Water Inlet on the chiller. This draws warm water from the lowest point of the tub.
- The Top Return Line: Connect your second insulated thermal hose from the upper port marked Water Outlet on the chiller directly to the top water inlet valve on your pod.
- The Cooling Loop: Water flows systematically out from the bottom of the tub, passes through the integrated mesh debris filter, travels across the internal cooling loops, and pumps back out into the top of the tub.
Option B: Retrofitting a Standard Home Bathtub (No Ports)
If you are converting a traditional bathroom porcelain or acrylic tub, use the secondary high-volume submersible pump included in the package to drive the water cycle over the rim.
- Position the Submersible Pump: Attach your bottom intake hose to the nozzle of the included submersible pump. Lower the pump over the rim until it rests completely underwater flat on the floor of your bathtub.
- Inlet Connection: Attach the opposite end of that pump hose directly to the lower Water Inlet port on the chiller.
- Return Line Configuration: Take your second insulated thermal hose and attach it to the upper Water Outlet port on the chiller. Use the universal rim hooks to secure the loose end of the line inside your tub, ensuring it returns water safely without slipping loose.
Golden Installation Hacks:
- If the thick thermal hose feels too rigid to press onto the pump or adapters, use a standard hair dryer to gently warm and soften the plastic ends for 30 seconds. It will slide on effortlessly and form a tighter seal as it cools.
- If your specific pump setup uses a male fitting that conflicts with your line, cleanly trim off a small section of the inner hose. Trimming lines to fit your domestic layout will not affect your return policy or product warranty options.
Technical Specifications: 1/3 HP System Layout
| System Component | Engineering Specification |
|---|---|
| Motor & Output | 1/3 HP Industrial-grade compressor (600W power draw) |
| Acoustic Rating | 39–45 dB (noticeably quieter than a domestic kitchen refrigerator) |
| Total Water Capacity | Handles total system volumes up to 250 Liters (66 Gallons) |
| Cooling Velocity | Drops 66 gallons from 75°F to 50°F in ~8 hours; hits 45°F in ~12 hours |
| Minimum Safe Limit | 42°F (built-in safety threshold to prevent internal line freezing) |
| Physical Footprint | 14.9″ L × 11.8″ W × 12.6″ H |
| Total Net Weight | 35 lbs (highly portable for seasonal storage or indoor moves) |
| Filtration Core | Integrated mesh barrier for leaves, sand, and large organic debris |
Real-World Troubleshooting & Diagnostic Checks
If your system encounters performance drops, run through these mechanical verification checks before reaching out to customer support.
Symptom 1: Water Temperatures Aren’t Decreasing
- Check Ambient Air Temperatures: The 1/3 HP compressor is optimized for ambient room temperatures below 95°F (35°C). If the unit is sitting on a baking patio in direct sunlight, move it to a shaded, well-ventilated space.
- Verify Cabinet Clearance: Never operate a water chiller inside a closed cabinet or tight storage closet. The unit must reject thermal heat into the air; trapping its own hot exhaust causes immediate system short-cycling. Place it out on an open, flat floor surface.
- Exceeded Thermal Mass: If you are trying to chill a large 150-gallon custom pool with a 1/3 HP motor, the volume of water simply outpaces the 600W cooling capacity. Consider downsizing your tank volume or upgrading to a heavy-duty 1 HP model.
Symptom 2: Water Circulation Drops or Stops Completely
- Clear Line Kinks: Trace both insulated thermal hoses from end to end. A sharp bend or kink inside thick insulation can completely choke your water flow.
- Reset the Submersible Core: If utilizing a bathroom setup, unplug the submersible pump from the wall outlet, wait ten seconds to clear any internal electrical resistance, and plug it back in to reset the internal impellers.
- Verify Inline Valves: If plumbing into a specialized recovery pod, ensure that the mechanical inline valves on the pod walls are turned completely to the open position.
Everything You Need to Know About Cold Plunge Chillers
What exactly is a cold plunge chiller, and why is it replacing ice?
A cold plunge chiller is essentially a dedicated, high-powered refrigeration system built specifically to pull heat out of your recovery water and keep it consistently locked at your target temperature. Instead of constantly driving to the store to haul heavy, expensive bags of melting ice, a chiller automatically keeps your tub between 36°F and 50°F. For anyone utilizing residential plunge tubs between 100 and 150 gallons, a heavy-duty 1HP unit is considered the absolute minimum recommended power to keep the water genuinely icy without burning out the motor.
What size chiller do I actually need for my setup?
If your tub holds anywhere between 90 and 150 gallons of water, a 1HP cold plunge chiller is the ideal sweet spot. Choosing an underpowered motor means the machine will have to run continuously just to fight ambient room temperatures, whereas a true 1HP unit delivers the robust cooling power needed for rapid temperature drops and stable, back-to-back recovery sessions.
Pro Tip: Don’t just look at the volume of your tub—consider its insulation. If you are using an uninsulated or thin-walled setup, a 1HP chiller is mandatory to counteract the constant ambient heat transfer through the walls of the tub.
Who is this heavy-duty 1HP chiller designed for?
This specific setup is engineered for anyone serious about making cold therapy a seamless part of their daily lifestyle. It is a perfect match for:
- Home Gyms & Backyards: People looking for a permanent, hassle-free garage or patio setup.
- Athletes & Biohackers: High-performance individuals who require precise, repeatable daily temperatures for inflammation management and recovery.
- Commercial Spaces: High-traffic environments like wellness spas, recovery clinics, and local commercial gyms that need fast cooling resets between multiple users.
What temperature range can this system reach?
This 1HP chiller can drop your water temperature all the way down to a bone-chilling 36°F. The system is intentionally capped at 36°F because trying to force the water any lower risks freezing the internal lines entirely, which can cause severe structural damage to the heat exchanger. Rest assured, even for veteran cold-plungers, a true 36°F extraction delivers an incredibly intense, top-tier therapeutic shock.
How fast will it take my water to get cold?
On average, this system drops water temperatures at a rate of 5°F per hour, which makes it up to three times faster than standard, entry-level models on the market. Keep in mind that exact cooling times will always vary slightly depending on your local ambient air temperature, the total volume of water you are trying to cool, and how well-insulated your specific tub happens to be.
Is a 1HP chiller going to sound like a jet engine in my backyard?
Not at all. While it packs a massive 2700W of cooling capacity, it operates at a very low to moderate noise level that is highly comparable to a standard, small window air conditioning unit. It hums quietly in the background, making it perfectly discreet for indoor home gyms, closed garages, or outdoor patios without annoying your neighbors or disrupting your focus.
Is the installation complicated, or do I need a plumber?
The entire system is completely plug-and-play and requires absolutely zero professional tools or plumbing experience to set up. You simply run the included inlet and outlet hoses, clamp your connections tight, fill your tub, plug the unit into a standard outlet, and select your target temperature on the digital LED control panel.
Pro Tip: Always make sure your water lines are completely full and primed before turning the chiller motor on. Running a high-efficiency pump completely dry, even for a few minutes, can cause unnecessary wear on the internal impellers.
Will this machine completely tank my monthly electricity bill?
Surprisingly, no. Because a 1HP motor delivers significantly higher cooling efficiency than an underpowered model, it hits your target temperature incredibly fast and shuts down, rather than chugging along all day.
To put it into perspective: a standard deep-cooling cycle that drops water from a warm 90°F all the way down to a crisp 39°F consumes roughly 4.25 kWh of electricity. Based on an average US energy cost of $0.14/kWh, an entire heavy-duty cooling cycle costs only about $0.60.
What are the exact spacing and clearance requirements?
To keep the internal components cooling efficiently and to prevent the unit from overheating, you need to give the machine room to breathe.
- Minimum Clearance: Leave at least 10 inches of wide-open space around all sides of the chiller casing.
- Ideal Clearance: For indoor gyms or warmer outdoor climates, a clear border of 12 inches is highly recommended for optimal ventilation and heat dissipation.
Always avoid tucking the chiller into tight, unventilated storage closets or tight corners where its own hot exhaust air can loop back into the intake.
How much ongoing maintenance am I signing up for?
Maintenance is incredibly minimal and takes just a few minutes a month. To keep the water crystal clear and protect the internal machinery, you only need to focus on two core tasks:
- Swap the filter cartridge regularly: This prevents hair, body oils, and fine debris from clogging up the internal titanium coils.
- Inspect your lines: Do a quick visual check on your hose connections and clamps every few weeks to verify everything remains perfectly airtight.
Will it connect to my existing, random brand of bathtub?
Yes, this water chiller is universally compatible with the vast majority of ice baths and bathtubs on the market. If you own an inflatable tub with dedicated threaded ports, it hooks up directly. If you are using a standard household tub, stock tank, or a barrel without built-in ports, you can easily run the lines over the top rim using the included high-volume submersible pump and universal hose kit.
What are the unboxing shipping dimensions and weights?
To ensure fast transit times across the United States, units are dispatched from the nearest domestic fulfillment center out of regional warehouses located in New Jersey, California, and Georgia.
The heavy-duty box arrives securely strapped with the following package specifications:
- Package Dimensions: 21″ × 22″ × 28″
- Total Shipping Weight: 83 lbs
What kind of warranty protection comes with the system?
Every unit is fully backed by a comprehensive 1-year warranty that completely covers any unexpected manufacturing defects or functional component issues. If your system experiences a mechanical issue within your first year of normal use, customer support will coordinate troubleshooting, repairs, or a full replacement to get you back into your routine as quickly as possible.
Real Talk on Cold Plunge Chillers, Bathtub Hacks, and Hitting the Perfect Temperature
Do you actually need a dedicated chiller for a cold plunge, or is ice fine?
If you only plunge once every two weeks, buying a few bags of ice at the gas station is perfectly fine. But if you are trying to make cold therapy a daily habit, dragging heavy, melting bags of ice to your tub turns into a miserable chore.
From a purely financial perspective, the tipping point happens surprisingly fast. Spending $15 on ice three times a week adds up to nearly $180 a month. A high-efficiency chiller essentially pays for itself in less than six months while completely automating your routine. You wake up, press a button, and jump into a perfectly regulated tub without doing any heavy lifting.
Golden Tip: Beyond the convenience, ice cubes cause massive temperature swings. You dump the ice, the water spikes down, and then it steadily warms up while you are inside. A dedicated chiller keeps the water moving and holds an exact, hyper-consistent temperature during your entire session, which triggers a much more effective cold-shock response.
What temperature does Joe Rogan actually set his ice bath to?
Joe Rogan famously keeps his cold plunge set anywhere between 33°F and 34°F, often using heavy-duty commercial setups or dumping literal blocks of ice to keep it hovering just above the freezing mark.
While that extreme level of cold is great for internet clips, clinical research shows you do not need to freeze yourself to get the full benefits. Hitting a reliable 36°F to 42°F is the sweet spot for a massive dopamine release, reducing muscle inflammation, and boosting metabolic function.
Pro Tip: Do not force a standard residential chiller to hunt for 33°F. Most consumer machines are capped around 36°F for safety. Trying to bypass those limits can freeze the internal water lines, crack the titanium heat exchange coils, and instantly void your warranty. A stable 37°F will give you 99% of the health benefits without destroying your machine.
Can you actually hook up a cold plunge chiller to a standard indoor bathtub?
Yes, you absolutely can turn your home bathtub into a professional recovery setup using a universal cold plunge chiller kit. You do not need to drill holes into your porcelain or acrylic tub. Instead, you use a high-volume submersible pump that sits directly on the bottom of your tub. One hose pulls the warm water up and over the rim into the chiller, and a second insulated hose pumps the ice-cold, filtered water back into the bath.
How do you stop a standard home bathtub from losing its chill?
Standard household bathtubs have zero insulation. Unlike thick, specialized commercial plunge barrels or multi-layered inflatable tubs, a regular bathroom tub will constantly lose its cold temperature to the ambient air in the room, forcing your chiller to run much longer than it needs to.
Golden Tip: To turn your bathroom into a highly efficient recovery zone, go to a local hardware store and buy a sheet of thick foam insulation, or simply use an old, heavy yoga mat. Cut it to match the exact top profile of your bathtub. Keeping the tub covered with this makeshift thermal lid while the chiller runs will cut your cooling time completely in half and save a ton on your electricity bill.
Is there a hot tub out there that can also double as a cold plunge?
Standard residential hot tubs are strictly one-way streets—they are designed to heat water up to 104°F, but they have no mechanical way to pull heat out. To get a setup that handles both, you need to look for a dual-zone system or pair your tub with a specialized chiller that features a built-in automated heat pump.
These advanced dual-function units use a reversing valve to switch the refrigeration loop. With the flip of a switch, the machine can cool the water down to a crisp 36°F for a morning recovery session, or reverse the cycle to heat the water up to 104°F for a relaxing muscle soak at night.
- Mind the transition time: Do not expect a machine to flip from ice-bath to hot-tub mode in twenty minutes. Moving 100 gallons of water across a 60-degree temperature spectrum typically takes several hours, so it is best to plan your schedule out ahead of time.
What are the main features to look for when hunting for the best cold plunge chiller?
When the team at Shoppy Express analyzes recovery gear, they prioritize three main pillars: motor power, filtration efficiency, and water sanitation technology.
- A 1HP Motor: Gives you the mechanical muscle to rapidly drop water temperatures even if your setup is sitting outside on a hot patio.
- Multi-Stage Filtration: Built-in 1-micron sediment filters are essential for catching hair and skin cells before they gunk up the machinery.
- Ozone Sanitation: Premium setups often include an integrated ozone generator. Ozone actively breaks down organic matter, bacteria, and body oils on a molecular level, keeping your water crystal clear and odor-free for months at a time.
Is a DIY cold plunge chiller setup actually worth the weekend hassle?
If you spend an hour browsing the cold plunge communities on Reddit, you will see hundreds of people building DIY setups using old chest freezers, aquarium chillers, and external pond pumps. While patching together your own kit can save a bit of money upfront, it comes with a massive headache.
Aquarium chillers are built for slow, gentle temperature regulation to keep fish alive; they are not designed to rapidly drop 100 gallons of water down to freezing temperatures. Furthermore, chest freezers are notorious for leaking over time if the internal liners aren’t perfectly sealed with marine-grade silicone.
For a daily routine you can actually rely on, investing in an all-in-one, plug-and-play unit with built-in safety shutoffs and integrated filtration saves an immense amount of time, maintenance, and potential water damage to your floors.
Going from an occasional ice-bath dabbler to managing a permanent, heavy-duty home cold plunge setup is a massive lifestyle upgrade. But the learning curve is real. The industry has evolved rapidly over the last couple of years, and the market in 2026 looks completely different than it did during the initial post-pandemic boom.
If you are trying to cut through the marketing noise, figure out why a machine isn’t cooling, or design the ultimate home setup, here is the unfiltered reality of owning and maintaining a high-end cold plunge.
1. The Brutal Truth: Things I Wish I Knew Before Buying
Everyone talks about the dopamine hits and muscle recovery, but nobody talks about the logistics. Before dropping cash on a system, there are a few environmental and mechanical realities you have to prepare for.
- The Condensation Storm: If you place an uninsulated tub indoors or in a humid garage and drop the water to 40°F, the outside of the tub will literally “sweat” gallons of water onto your floor. Indoors, a heavy-duty containment pan or commercial-grade waterproofing underlayment is non-negotiable.
- The Power Surge: A 1 HP chiller is a mechanical beast. When that high-efficiency compressor kicks over, it draws a massive spike in starting amps. If you have it on a shared residential circuit with a treadmill, space heater, or garage fridge, you will trip your breaker. It demands a dedicated GFCI outlet.
- The Thermal Lid Rule: Running a chiller without an insulated, tight-fitting lid is like running your home air conditioning with all the windows wide open. You lose up to 70% of your cooling efficiency to ambient air transfer.
2. 1/3 HP vs. 1 HP: The Summer Heat and Degradation Reality
A common debate on forums like Reddit is whether to save a few hundred bucks by grabbing a 1/3 HP or 1/2 HP chiller instead of a full 1 HP unit.
Do these machines degrade over time?
Yes, absolutely. Like any appliance with a compressor, moving fans, and a water pump, performance will steadily degrade over a multi-year lifespan. However, how fast they degrade depends entirely on how hard they have to work.
The 100°F Outdoor Summer Survey
If your plunge is sitting outdoors on a patio or deck during a blazing 100°F summer day, an entry-level 1/3 HP or 1/2 HP chiller is fundamentally set up to fail. Because it lacks the raw cooling capacity (usually maxing out around 600W to 1000W), it will run 24/7 without ever reaching its target temperature. This constant, non-stop operation causes the internal compressor valves to overheat, short-cycle, and completely burn out within one to two seasons.
Conversely, a robust 1 HP unit delivers roughly 2700W of cooling power. It has the mechanical muscle to drop the temperature to a crisp 36°F within a few hours, shut itself off, and rest. Because it cycles on and off naturally, a 1 HP motor degrades at a fraction of the speed, easily offering a lifespan of 20,000+ operating hours under identical conditions.
3. The 2026 Market Shakeup: Brand Reliability
The cold plunge landscape went through a massive correction over the last 12 months. In 2024 and 2025, dozens of fly-by-night brands popped up overnight, buying cheap, uninsulated plastic tubs and basic aquarium chillers from overseas factories, slapping a fancy logo on them, and selling them at a 300% markup.
By 2026, many of these white-label brands (including highly publicized names like Edge Theory, older iterations of Odin, and various generic drop-shippers) began collapsing or going completely out of business because they couldn’t sustain the sheer volume of warranty claims on failing parts.
What makes a home setup reliable?
When hunting for a permanent home setup, you want a brand that functions as an all-in-one utility rather than a collection of mismatched parts. Reliability comes down to heavy-duty, commercial-grade hardware integrated into a clean, smart framework.
For a rock-solid configuration that handles extreme outdoor heat while keeping water entirely clear, the industry standard relies on setups featuring a 1 HP motor, multi-stage filtration, built-in ozone sanitation, and smart WiFi integration. Systems like the professional-grade packages found at plungechill.com succeed because they pair high-output Japanese compressors with heavy-duty weatherproofing, ensuring the system can live outdoors year-round without its internal logic boards frying.
4. A Technician’s Guide to Water Maintenance & Troubleshooting
Troubleshooting: Why is your chiller not cooling?
If your pump is humming but the water temperature isn’t budging, do not assume the compressor is broken. Nine times out of ten, the issue is caused by one of two easily fixable bottlenecks:
- The Invisible Air Lock: If you recently drained your tub or disconnected a hose, an air bubble can get trapped inside the water pump impeller chamber. When this happens, the pump spins but cannot actually push water through the chiller lines. Because the water inside the machine isn’t moving, the internal sensors automatically shut down the cooling loop to prevent the titanium coils from freezing solid. The Fix: Turn off the machine, unhook the outlet hose slightly until water completely flushes the air out, tighten it back up, and turn it back on.
- The Clogged 1-Micron Barrier: A high-precision 1-micron filter is incredible for keeping water clear, but it catches body oils and fine skin particulate fast. If that filter cartridge isn’t swapped regularly, it starves the chiller of water flow, triggering an automatic safety shutoff.
What actually works for pristine water maintenance?
You do not want to use heavy residential pool chemicals like standard chlorine tabs in a cold plunge; sitting in concentrated pool chemicals at 40°F will dry out your skin and ruin your recovery experience. Instead, the ultimate maintenance stack relies on a combination of mechanical filtration and molecular oxidation:
[Built-in 1-Micron Sediment Filter] ➔ Catches physical hair, dirt, and skin cells.
                 ⬇
[Automated Ozone (O3) Generator]    ➔ Destroys bacteria, viruses, and body oils on contact.
                 ⬇
[Low-Dose Hydrogen Peroxide (H2O2)] ➔ Optional periodic shock to maintain absolute clarity.
Using a system with automated Ozone (O3) sanitation means the gas actively oxidizes organic impurities on a molecular level, reverting straight back into pure oxygen without leaving a chemical residue or a harsh chemical smell.
5. The Dream Home Setup: Bathroom Remodeling Ideas
If you are planning a comprehensive home or bathroom remodel and want to integrate a permanent indoor plunge, you are playing the long game. This is the ultimate luxury wellness upgrade, but you must plan for the structural and architectural demands before the drywall goes up.
Structural Load Capacity
Water weighs roughly 8.34 lbs per gallon. A 100-gallon plunge tub contains 834 lbs of water weight alone. Add a 73-pound chiller unit and a 180-pound adult, and your floor is suddenly supporting over 1,100 lbs inside a tight 4×3 foot footprint. If your remodel is on a second story, your contractor must structurally reinforce the floor joists to prevent catastrophic sagging over time.
The Trade-Offs of a 1 HP Indoor Unit
While a 1 HP chiller is the absolute king of fast cooling, placing it inside a finished residential bathroom requires managing its trade-offs. The machine features a powerful exhaust fan designed to push extracted heat clean out of the system. In a small, enclosed bathroom with zero airflow, that exhaust will quickly turn the room into a warm, humid sauna.
- The Remodel Fix: When building your layout, design a dedicated utility closet or a vanity niche for the chiller that vents directly into an exterior wall or an attic exhaust system. Furthermore, treat the entire floor area as a wet zone—install a dedicated floor drain and use full-coverage tile with a commercial-grade waterproof membrane (like a Schluter-Kerdi system) beneath the grout lines to handle regular splashing and inevitable condensation.
Designing Your Space for Indoor Luxury or Outdoor Heat
Integrating a professional 1 HP chiller into a home recovery system offers incredible health benefits, but it requires careful environmental planning. Whether a system is going into a high-end indoor bathroom remodel or out onto a scorching backyard patio to battle 100°F summer days, each environment presents distinct engineering and structural challenges.
The review team at Shoppy Express analyzes these setups from a practical, structural perspective to ensure the machinery operates efficiently without risking property damage. Here is the exact design blueprint for managing both installation extremes.
The Indoor Bathroom Remodel Blueprint
Integrating a heavy-duty chiller into an indoor bathroom renovation is the ultimate wellness luxury, but it requires treating the space more like a commercial wet room than a standard residential bathroom.
- Structural Floor Reinforcement: A standard residential floor is typically designed to handle roughly 30 to 40 lbs per square foot. A 110-gallon cold plunge setup pushes well past 1,100 lbs once you factor in the water weight, the heavy-duty 73-pound chiller unit, and the user. Contractors must sister the floor joists or add solid blocking underneath the subfloor to prevent structural sagging or ceiling cracks in the room below.
- The Waterproofing Membrane Stack: Condensation and splashing will happen daily. The entire footprint of the plunge area should be wrapped in a continuous waterproof tanking membrane beneath the tile or stone flooring to protect the subfloor from rot.
- Dedicated Low-Profile Floor Drain: Do not rely solely on a standard shower drain. Installing a dedicated, secondary slope drain directly next to the plunge tub is highly recommended to handle immediate water displacement when stepping out of the tub.
- HVAC and Venting Isolation: A 1 HP chiller pulls heat out of the water and expels it into the surrounding air. In a tight, enclosed bathroom, that hot exhaust will quickly turn the room into a humid sauna, forcing the chiller to work twice as hard. The chiller needs to live in a ventilated vanity cabinet or a dedicated utility closet equipped with an active exhaust fan that vents directly to the home’s exterior.
The Outdoor Summer Heat Patio Blueprint
Setting up a cold plunge outdoors in states like Texas, Arizona, or Florida means the system will regularly battle ambient temperatures hovering around 100°F. This is where an entry-level 1/3 HP motor fails, and a 1 HP compressor becomes mandatory.
- Defeating the 100°F Thermal Load: An underpowered chiller will run non-stop in extreme heat, causing the compressor to short-cycle and degrade within a single season. A 1 HP unit delivers 2700W of pure cooling capacity, giving it the mechanical strength to drop the water down to a crisp 36°F even under a direct summer sun, before shutting down to preserve its components.
- Shade and Ambient Placement: Even with a weather-tested, heavy-duty outer casing, letting a chiller sit in direct, pounding sunlight adds unnecessary thermal stress. Position the machine under a covered patio, pergola, or a dedicated ventilated deck box to shield the digital LED display and internal cooling fans from UV degradation.
- The Heavy-Duty Thermal Lid Rule: Without a thick, insulated marine-grade foam lid, an outdoor plunge tub acts like a giant radiator, absorbing the surrounding summer heat. A tight-fitting thermal lid cuts ambient heat transfer by up to 70%, allowing the chiller to maintain sub-40°F water while using a fraction of the electricity.
- Winterization Prep: If the outdoor location experiences freezing winters alongside scorching summers, ensure the chiller features a quick-drain valve. When temperatures drop below freezing, flushing the internal titanium coils prevents trapped water from expanding and cracking the heat exchanger.
The Step-by-Step Universal Plumbing Setup
Setting up the plumbing for a 1 HP cold plunge chiller is straightforward, but doing it in the wrong order can cause immediate airlocks or slow leaks. Whether utilizing a dedicated inflatable tub with built-in ports or converting a standard home bathtub with a submersible pump, the core water loop remains identical.
Phase 1: Positioning and Airflow Clearance
Before attaching a single hose, place the chiller unit on a flat, stable surface. Ensure there is a minimum of 10 to 12 inches of open clearance around all sides of the machine. The powerful 1 HP exhaust fan needs to push hot air out freely; trapping it against a wall will quickly cause the compressor to overheat and drop in efficiency.
Phase 2: Connecting the Water Intake Loop (Tub to Chiller)
The goal of this phase is to pull water out of the tub, clean it, and feed it into the cooling intake.
- Connect to the Tub’s Drain or Pump: If using an inflatable tub, screw the heavy-duty water pipe onto the bottom outlet port. If converting a standard home bathtub, attach the insulated hose directly to the outlet nozzle of the included submersible pump and submerge the pump at the deepest end of the tub.
- Route to the External Filter: Run that same hose into the inlet side of the external 1-micron sediment filter system. This ensures hair, body oils, and debris are caught before the water hits the delicate internal cooling coils.
- Attach to the Chiller Inlet: Run a short piece of insulated pipe from the outlet side of the filter system straight into the port marked Water Inlet on the back of the chiller unit. Hand-tighten the plastic connection nut, then give it a quarter-turn with a wrench to ensure an airtight seal.
Phase 3: Connecting the Water Outlet Loop (Chiller to Tub)
This phase returns the freshly chilled, sanitized water back to your tub.
- Attach to the Chiller Outlet: Take your third insulated water pipe and connect it directly to the port marked Water Outlet on the chiller.
- Route Back to the Tub: Run the opposite end of this hose back up and over the rim of the bathtub (using the install kit’s universal rim hooks) or screw it directly onto the top inlet port of your dedicated plunge tub.
Phase 4: Priming the Pump and Flooding the Lines
Important Operating Rule: Never turn on a cold plunge chiller while the lines are dry. Running a high-efficiency pump without water will instantly burn out the internal impellers.
- Fill the Tub Entirely: Fill your tub with water until it completely covers the built-in ports or sits at least 4 inches above the submersible pump.
- Open the Air Vent Valves: Locate the one-button venting system or the manual air release valve on top of the filter housing. Press or twist it open. You will hear a loud hissing sound as the ambient air is pushed out and water naturally floods down into the hoses, the filter, and the chiller’s titanium heat exchange loops.
- Check for Drips: Once water starts trickling out of the air valve, close it. Look closely at all your hose clamps and connection nuts to verify there are absolutely no slow water drips.
Phase 5: Power On and Temperature Configuration
- Plug the chiller into a dedicated, grounded GFCI wall outlet.
- Flip the main power toggle or rear reset switch to the “On” position.
- The digital LED control panel will light up, displaying the current temperature of your water. Use the intuitive 3-button interface to set your target temperature (such as 39°F) and press lock.
- The pump will engage immediately, followed by the hum of the Japanese compressor a few minutes later.
Plunge Chill Shipping and Delivery Expectations
When ordering directly from Plunge Chill, understanding the logistics keeps delivery timelines transparent. Shoppy Express analyzed their fulfillment framework to break down exactly what happens after checkout to help manage your delivery expectations.
- Mainland USA Shipping Costs: Shipping is completely free across the mainland United States unless a specific exception is explicitly noted at checkout.
- Dispatch Windows: Orders typically leave the warehouse within 1 business day after payment is processed, though rare logistics delays can extend handling up to 3 business days.
- Transit Timelines: Standard delivery across the mainland USA takes between 2 to 5 business days. Plunge Chill utilizes major domestic networks including UPS, FedEx, USPS, and Amazon Shipping.
- Delivery Delays: If a delivery exceeds 7 business days, or is delayed beyond 10 business days, buyers should reach out to support immediately so the brand can investigate or arrange a replacement item if necessary.
- Address Changes and Cancellations: You can request an address update or cancel an order within a 1-day window after purchase, provided the item has not yet been dispatched. Once an order ships, modifications or cancellations are no longer permitted.
- P.O. Boxes and Out-of-Stock Items: Shipments to P.O. boxes are handled exclusively through standard postal services rather than commercial couriers. If an individual item is out of stock, it is automatically cancelled and refunded while the remaining items in the order ship.
- Damaged Shipments: If a parcel arrives damaged in transit, customers are advised to accept the delivery anyway and immediately email the support team to resolve the issue.
The 30-Day Return Policy and Refund Rules
Plunge Chill offers a return window for buyers who change their mind or encounter manufacturer defects within the first month of ownership. However, there are fine-print financial details that shoppers need to note before initiating a return request.
| Return Metric | Policy Details |
| Return Window | 30 days from the date of delivery. |
| Restocking Fees | $0 (Plunge Chill charges no processing, return, or restocking fees). |
| Return Shipping Cost | Paid entirely by the customer. |
| Warehouse Locations | California (CA), Georgia (GA), and New Jersey (NJ). |
| Inspection Timeline | Up to 14 days after the warehouse receives and reviews the item. |
Return Eligibility Conditions
To successfully secure a refund, the returned hardware must match strict quality criteria:
- The item must be completely unused, entirely undamaged, and sealed inside its original packaging.
- A valid receipt or order confirmation must be provided with the request.
- Items sent back to a warehouse without prior email contact and approval will be rejected automatically.
- Non-returnable exceptions include personalized or custom items, personal care or beauty goods, hazardous materials (flammable liquids or gases), gift cards, and all sale items.
Once an approved return is fully inspected, the refund is issued to the original payment method. It typically takes banks or credit card companies an additional 5 business days to post the funds. If a refund is still missing after 15 business days of official approval, customers should contact the support team.
Understanding the 12-Month Warranty and Troubleshooting Map
Plunge Chill backs the usability and performance of their hardware with a 12-month warranty beginning on the delivery date. This guarantee protects against factory faults, component defects, and shipping damage, provided the equipment has not been subjected to customer neglect, improper storage, or misuse.
The Standard 4-Step Warranty Resolution Flow
If a component fails, the brand does not offer straight refunds under the warranty program; they only issue replacements for verified faulty items. The engineering team processes claims through a mandatory remote evaluation framework:
- Initial Assessment: The support team reviews the submission details upon receiving an email at support@plungechill.com containing a description of the issue, an explanation of how it occurred, and required photo or video evidence.
- Remote Troubleshooting: Many issues stem from installation adjustments or water flow restrictions. Customers are required to complete basic setup adjustments guided by step-by-step instructions or video resources provided by the brand before further action is taken.
- Repair Evaluation: If the issue can be resolved through simple adjustments, the team guides the customer through the fix. If the unit requires advanced internal repairs or opening the main chassis, the customer will not be required to perform these actions.
- Replacement Handling: If remote steps fail to resolve the problem, Plunge Chill issues a return shipping label, coordinates the return of the faulty unit, and processes a brand-new replacement component free of charge.
Real-World Cooling Performance Standards
To set realistic consumer expectations, the review team at Shoppy Express analyzed Plunge Chill’s internal engineering benchmarks. The standard water chiller is explicitly optimized and tested for compact setups like their Portable Insulated Ice Bath.
Baseline Operating Expectations
Under ideal operating conditions—defined as a 50 to 52-gallon water volume (approximately 200 liters), standard USA tap water starting temperatures (55°F to 65°F), and a shaded environment protected from direct sunlight—the unit delivers the following metrics:
- Cooling Velocity: The unit drops water temperatures at a steady rate of 2°F to 4°F per hour.
- Target Velocity Window: It successfully reaches the recommended cold plunge baseline of 49°F to 52°F within 1 to 3 hours. Total cooling times can span anywhere from 30 minutes to 5 hours depending heavily on external variables.
- The Ultimate Minimum Threshold: The system can achieve a lowest temperature floor of approximately 39°F. However, hitting temperatures below 45°F may become mechanically impossible if the environment is fighting external heat loads.
Environmental Pitfalls That Degrade Performance
A chiller’s efficiency drops significantly when exposed to specific stressors. Performance degradation occurs during high ambient air temperatures above 85°F, elevated humidity levels, direct sunlight on the chiller or water vessel, or when trying to chill total water volumes exceeding 66 gallons (250 L).
If the chiller faces prolonged ambient temperatures above 75°F or intense sunlight, it should be operated indoors or inside a climate-controlled room. If poor cooling performance occurs, Plunge Chill requires users to submit location data, air temperatures, and water temperature readings, and conduct a formal 5-hour performance test to diagnose the thermal setup.
Brand Contact Information
For official claims, technical inquiries, or tracking updates, the manufacturer can be reached through their primary service channels:
- Support Email: support@plungechill.com (aims to respond within 24 hours)
- Direct Phone Line: +1 (305) 326-3656
- Finding a reliable setup doesn’t have to break the bank, which is why this system easily claims the spot as the #1 affordable cold plunge chiller on the market today. Backed by an impressive 4.8 out of 5-star rating from 223 verified customer reviews and a matching 4.8 Trustpilot score, it delivers the consistent, elite-level cooling performance you need without the premium price tag. They highly recommend taking advantage of this proven, budget-friendly utility to completely transform your daily recovery routine.